
In brief: Build a retro light from a vintage bulb by first fitting a suitable lamp holder with a cable. Then create a personalised lampshade or housing. Connect the components safely and complete the DIY project with a suitable lamp base or suspension. The result is a unique designer light.
DIY Retro Lamp: Build a Vintage Bulb Light
A homemade lamp adds personality to your home. A vintage bulb with a retro design creates a distinctive accent. This guide takes you through the process.
What materials do you need?
The basic setup is straightforward. You need a vintage bulb, a suitable lamp holder, a connection cable and a switch. For the base or suspension, choose wood, metal or an upcycled object.
Don't forget the small electrical components. Wire ferrules, terminal blocks and a suitable plug connection are essential. Have tools such as wire strippers and a screwdriver ready.
Important note
Only work on the low-voltage side of your lamp. A qualified electrician should make the final connection to the 230-volt household wiring. Use only tested and undamaged components.
Choosing the right vintage bulb
Distinctive bulbs have clear or frosted glass envelopes, often with visible filaments. Pay attention to the base. E27 is the standard screw base, while E14 is the smaller candle base.
Original vintage bulbs have plenty of charm, but are often inefficient. Modern retro LEDs combine the design with a long service life and low heat output. They are a good choice for bedside lamps.
How do you build the lamp housing?
The housing gives your lamp its shape and style. A simple option is to use an existing object. Tins, vases or old containers can become a lamp base.
Drill a hole for the cable. Secure the lamp holder from the inside with a retaining nut. Make sure you use stable, heat-resistant materials.
The appeal of a DIY lamp lies in its imperfections. Use materials with a history – a piece of driftwood, an old industrial component. The patina tells a story that no new piece of furniture can match.
Designing your own lampshades
A shade directs the light and protects your eyes. Make one from paper, fabric or thin metal. A wire frame forms the base.
Stretch the fabric over the frame and secure it with glue or stitching. Perforated sheet metal is ideal for an industrial retro design. Find inspiration for fabric solutions in lanterns and pendant lights.
Expert tip
Test the heat produced by your bulb with the finished shade in place. Hold your hand where the shade is closest to the bulb. If it becomes uncomfortably hot, increase the distance or choose a more heat-resistant fabric.
How do you wire the lamp safely?
Correct wiring is essential for safety and functionality. Use a two-core installation cable. The wire with brown or black insulation is the live conductor (phase).
The blue wire is the neutral conductor. The green-and-yellow wire is the protective earth conductor. Connect these to the corresponding terminals in the lamp holder. A switch is connected in series with the live conductor.
Additional advice
Use terminal blocks or crimp connectors for secure contacts. Carefully insulate every connection with electrical tape or heat-shrink tubing. A loose connection can cause overheating.
Practical connection solutions
Pre-wired connection boxes are suitable for pendant lights. They simplify installation on the ceiling. Floor lamps need a stable base with a cable outlet.
Products such as the
2-piece table lamp set show what professional solutions look like. Study their construction for your own ideas.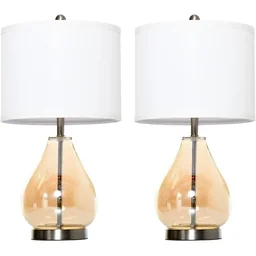
Where should you place your DIY retro light?
Your finished lamp deserves a special place. As a table lamp on a sideboard, it creates an eye-catching accent. As a pendant light above the dining table, it creates an atmospheric glow.
In a home office, a homemade desk lamp provides focused light. Matching seating such as the
padded vanity stool complement the retro design.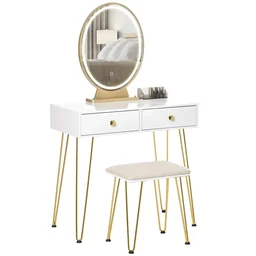
Light is the invisible architect of a room. A homemade lamp defines more than just a point of light; it also creates a mood. It adds warmth and focus where standardised lights often provide brightness alone.
Lighting for special rooms
In a child's bedroom, safety and friendly lighting are priorities. A homemade lamp must be especially robust and child-safe here. You can find plenty of inspiration in our category for figurine lamps and child-friendly design.
Industrial retro designs work well in workshops or hobby rooms. Use simple materials and clean shapes.
What should you do if there are problems?
Is the lamp not lighting up? First, test the bulb in another lamp holder. Then check all electrical connections to make sure they are secure and correctly wired.
If the light flickers, there is often a loose connection. In particular, check that the bulb is properly seated in the lamp holder and inspect the connections at the switch.
Maintaining and caring for your creation
Carefully dust the vintage bulb with a soft, dry cloth. Clean the housing according to its material. For fabric shades, gentle vacuuming can help.
Check the stability of the suspension and the condition of the cable at regular intervals. This is particularly important for lights near ceiling lights or in other locations used continuously.
Inspiration for Your Next DIY Lighting Project
Once you get started, the possibilities are endless. Build a floor lamp from an old water pipe. Create a chandelier from several vintage bulbs.
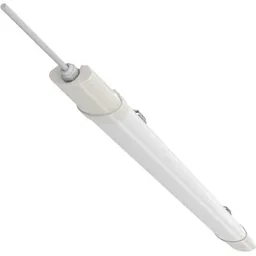
Experiment with different light colours. Warm white light (2700K) creates a cosy atmosphere, while neutral light (4000K) is suitable for working. Products such as the
or LED fluorescent tubes demonstrate the range.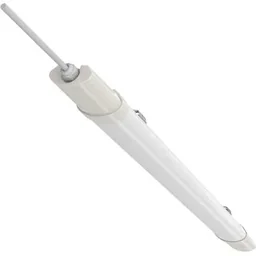
Your homemade retro lamp is more than just a functional item. It is an expression of your personal style and a one-of-a-kind piece with a story to tell. Get started today.
Frequently Asked Questions
- What tools do I need to build a lamp myself?
- You will need a screwdriver, side cutters, wire strippers, and possibly a drill and soldering iron for secure connections. A voltage tester is recommended. Depending on the material, you may also need a saw, file and sandpaper for the housing.
- Is it dangerous to connect an electrical lamp yourself?
- Connecting a lamp to the 230-volt household electrical system is not recommended for non-professionals. Only work on the low-voltage side or have an electrician check the final connection. Always use tested components and insulate all contacts.
- Where can I find attractive vintage light bulbs for my DIY project?
- Look for old light bulbs in antique shops, at flea markets or on online marketplaces. Check that the bases and sockets are intact. You can also find special retro LEDs with a vintage look from specialist retailers.
- Can I use any old light bulb for a DIY lamp?
- Check the base and voltage. E27 and E14 are common sizes. Very old or damaged bulbs pose a safety risk. For sensitive rooms such as the children's room, it is better to use modern cool-white LEDs with a retro look.
- Which lamp shapes are best suited to beginners?
- Start with a simple table lamp or a pendant light with a fixed cable. Complex bends or floor lamps with switches are more challenging. Find inspiration in our table lamps category.
You might also be interested in
- Build an upcycled lamp: Creative DIY lighting ideas
- Build an upcycled lamp from a toolbox
- Build your own lanterns: Creative ideas for your home & garden
- Old furniture, new life: The guide to upcycling
- Upcycling for your home and garden: Sustainable DIY projects
- Hygge in a jar: Make your own lanterns and DIY decorations