
In brief: Build your own sideboard by planning and cutting the required materials, such as wooden panels, screws and fittings, constructing the sides, shelves and doors, and assembling everything precisely. A finish of paint, stain or wax protects the wood and gives your one-of-a-kind piece the perfect final touch. The following steps guide you through the entire process.
Why build your own sideboard?
A DIY sideboard fits your alcove perfectly. You decide on the height, depth and layout. Your personal style is reflected in the type of wood, colour and handles. You can often save money compared with a similar branded piece of furniture. The pride you feel in your own creation is priceless.
This project develops your DIY skills. You learn how to work with tools and materials. The result is a unique piece tailored exactly to your needs. It provides storage for crockery, glasses and tablecloths.
How do I plan my DIY sideboard?
Start by choosing the location. Measure the available width, height and depth precisely. Take skirting boards and sockets into account. Sketch your design on paper. Decide whether you want open compartments, closed doors or a combination of both.
Define the internal dimensions. Allow enough height for tall glasses and plates. Standard depths are between 40 and 50 centimetres. Consider whether you need adjustable shelves. A furniture dolly makes it easier to move the sideboard later.
Pro tip
Use free furniture planning software or a simple drawing programme. This allows you to visualise the project in 3D. You can spot potential problems with proportions or stability at an early stage. Print out your drawing and keep it close at hand while you work.
Materials list and tool checklist
Create a detailed shopping list. Note the exact dimensions and type of wood for each component. Include screws, dowels, glue and fittings such as hinges in your calculations. Do not forget the finish: sandpaper, primer, paint or oil.
Plywood or edge-glued solid wood panels are suitable for the basic frame. They are sturdy and rarely warp. For the fronts, you can choose decorative woods such as oak or walnut. A product such as the provides a sturdy base for various constructions.
Which work steps are required?
1. Cutting the wooden parts
Transfer the dimensions from your drawing precisely onto the wooden panels. Use a combination square and a sharp pencil. Make your cuts with a guide rail. This gives you clean, straight edges. Label each part on the back immediately.
Sand all edges and surfaces thoroughly. Start with a coarse grit (e.g. 80). Work your way up to a fine grit (150-180). This prevents splinters later and prepares the surface for treatment.
Important note
Always wear respiratory protection and safety glasses when sanding and sawing. Wood dust can irritate the airways. Make sure your tools are standing securely. Clamp wooden panels firmly when sawing. Loose parts can cause dangerous kickback.
2. Constructing the carcass
Start with the side panels and shelves. Join the parts with wooden dowels and glue for maximum stability. Alternatively, use confirmat screws. These require precise pre-drilling. A piece of corner batten on the inside reinforces the corners.
Check that everything is square with a spirit level after each step. A crooked carcass is very difficult to correct later. Allow the glue to cure completely according to the manufacturer's instructions. Weigh down the glued parts with weights.
The key to a straight cabinet lies in precise preparation. Every millimetre of error in the cut multiplies during assembly. Measure three times, cut once.
3. Fitting the back panel and doors
The back panel strengthens the cabinet. Use a thin screen-printing or plywood panel. Secure it with small nails or screws. Make sure the finish is neat. For closed fronts, calculate the door overlap precisely.
Fit the hinges according to the instructions. Hinge drilling jigs guarantee exact spacing. The helps with precise positioning. Test the closing action before final fixing. Adjust the doors afterwards.
How do I design the interior and finish?
Shelves and internal layout
Plan adjustable shelves. Drill a row of holes for shelf supports at equal intervals. This allows you to adjust the height later. Reinforce long shelves with a strip along the front edge. This prevents them from sagging.
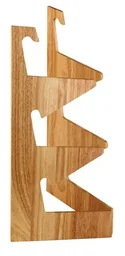
Baskets are ideal for practical storage. A system such as

Additional advice
Consider concealed lighting. An LED strip under the top panel creates a pleasant ambience. Run the cables discreetly through a routed groove in the back panel. Hide a low-voltage power supply inside the cabinet. A switch on the side allows you to control it.
Surface treatment and protection
Thoroughly remove all dust from the cabinet after the final sanding stage. Apply a wood primer. This seals the wood and ensures an even coat of paint. Apply thin coats. Lightly sand between coats.
Hardwax oil is ideal for a natural look. It highlights the grain and is easy to repair. Give the worktop particularly strong protection. Several coats of clear varnish or a specialist furniture oil are suitable here. Robust surfaces are also key for furniture accessories in children's areas.
The finish accounts for 50% of the overall impression. Take your time with the sanding. A perfectly prepared surface absorbs any varnish or oil better and lasts longer.
Assembly, Transport and Care
Assemble the cabinet as close as possible to its final location. This prevents damage when carrying it through narrow doorways. Use helpers or a . to stand it upright. This furniture lifter takes the strain off your back.
Make sure the cabinet is perfectly level. Use adjustable feet or wedges. This ensures the doors close properly. Check all the screws again after positioning the cabinet. Tighten them securely.
Care for your cabinet regularly. Wipe off dust with a soft, slightly damp cloth. Avoid abrasive cleaners. A mild all-purpose cleaner is sufficient for painted surfaces. After several years, you can sand down worn areas and repaint them.
A piece of furniture you build yourself can last for many years. With the right care, it will remain an eye-catching feature in your dining room for decades. Its personal touch and practical benefits will reward the work you put in every day.
Frequently Asked Questions
- What type of wood is best for a DIY sideboard?
- Affordable, easy-to-work-with pine or spruce is suitable for the interior construction. The visible fronts and worktops should be made from harder, more decorative wood such as oak, beech or walnut. This provides stability and an attractive appearance. Alternatively, veneered chipboard is a cost-effective option.
- Which tools do I absolutely need to build it?
- Essential tools include a jigsaw or circular saw for precise cuts, a cordless screwdriver, a spirit level, a tape measure and a square. For finishing the surfaces, you will need sandpaper in various grits. A dowelling jig or router makes precise joints easier, but is not essential.
- How do I calculate the amount of wood I need?
- Create a technical drawing with all the measurements. List each component separately, including its height, width and depth. Add up the areas and convert them into square metres. Allow for around 10-15% waste due to cutting errors and unusable areas of wood. Timber merchants can help with the conversion.
- Can I build a sideboard without solid wood dowels?
- Yes. Confirmat screws with pre-drilled holes are a quick and sturdy alternative. Modern Minifix or cross-dowel connector systems are even easier to use. These metal connectors are screwed into pre-drilled holes and provide excellent stability. They are ideal for beginners in furniture making.
- How do I protect the finished cabinet from stains and moisture?
- Apply a multi-layer sealant. After priming and sanding, clear varnish or hardwax oil is ideal for the top. Paints or special furniture stains are suitable for the carcass. Pay particular attention to the edges. Additional protection, such as a tarpaulin during transport, helps protect the surface.
You might also be interested in
- Build Your Own Sideboard: Custom Furniture for Your Living Room
- Build Your Own Bathroom Cabinet: Custom Storage Space
- Build DIY Furniture: Creative Ideas for Your Home
- Build Your Own Home Bar: The Perfect Guide to DIY Bar Furniture
- DIY Shelf with Integrated Speakers: Your Sound Furniture
- Build Your Own Table: A Guide to Side and Dining Tables