
In brief: Build a zigzag-pattern table from precisely cut wooden strips joined at 45- or 60-degree angles. The challenge lies in planning accurately and ensuring the zigzag joints fit perfectly. For a stable tabletop, glue the strips to a plywood base. The result is a striking graphic feature for a living room or children’s room.
How do I plan a zigzag-pattern table?
Planning is the key to a successful zigzag pattern. Start with a scale drawing on graph paper or use CAD software. Decide on the angle of your zigzag lines. 45 or 60 degrees are common and visually appealing angles.
Determine the size of your tabletop. Decide whether the pattern should cover the entire tabletop or only part of it as an accent. Calculate the number and length of wooden strips required. Take the width of the strips into account, as it determines the thickness of the zigzag lines.
Pro tip
Make a full-size pattern template from cardboard or thin MDF. This lets you see how the pattern will look in the room and adjust the proportions before cutting the expensive wood.
Choose the wood according to where the table will be used and your preferred style. Hardwoods are suitable for a robust dining table. For a romantic-style side table, you could also choose light-coloured maple. Consider the thickness: for a stable tabletop, the strips should be at least 18 mm thick.
Materials and tool checklist
You will need wooden strips with a consistent thickness and width. Buy slightly more than your calculations require. A mitre saw or chop saw with precise angle adjustment is essential. A table saw with a guide rail improves accuracy when making lengthwise cuts.
For gluing, you will need wood glue, plenty of clamps and possibly dowels for additional reinforcement. A plunge router helps round over the edges or cut profiles. For sanding large surfaces, a workbench trolley with a stationary sanding machine is useful, but a random orbital sander also does a good job.
“Precision is non-negotiable when working with geometric patterns. A difference of half a degree adds up across several zigzag joints and creates visible gaps. Invest in a high-quality saw or have the strips cut by a specialist supplier.”
How do I cut the zigzag strips accurately?
Set your saw precisely to the selected angle. Check the setting with a precision angle finder. First, cut all the strips to the required length. Clearly mark which side has which angle to avoid mix-ups.
Lay out the cut strips according to your plan as a trial assembly. Check that they fit together correctly. You can correct minor inaccuracies with a sander or fine saw. This step is time-consuming but crucial for a flawless result.
Important note
Always wear safety goggles and hearing protection when using circular saws and routers. Securely clamp small workpieces. Loose strips can be caught by the saw blade and kick back dangerously.
For a perfect finish, lightly bevel or round over the edges of the strips. This prevents sharp edges and emphasises the pattern by creating shadows. Use a router with a round-over bit for this.
The right gluing technique
Prepare a large, level work surface. An old door placed on trestles works well. Have your plywood or film-faced plywood base ready. It will provide stability for the finished construction.
Apply wood glue evenly to the side edges of the strips. Assemble the strips piece by piece according to your plan. Immediately use clamps to press each strip against its neighbours. Work quickly before the glue begins to set.
“When working with patterns made from many small pieces, I always use superglue for the initial temporary fixing. A small drop in an inconspicuous spot holds the pieces in position while I attach the clamps. This prevents them from shifting as the clamps are tightened.”
Clamp the entire glued tabletop to the base. Distribute the pressure points evenly to ensure consistent bonding. Remove excess glue immediately with a damp cloth. Leave the glue to cure for at least overnight, following the manufacturer’s instructions.
How do I sand and finish the tabletop?
Remove the clamps once the glue has cured. Start with coarse sanding. This removes glue residue and levels out minor height differences between the strips. Use 80 or 100 grit sandpaper for this.
Medium sanding with 120 to 150 grit smooths the surface. Always work in the direction of the grain. Pay particular attention to the transitions between the individual strips. They must be completely flush and smooth.
Additional advice
For a professional sanding finish, using an ESD workbench trolley with a stationary sanding machine is recommended. Especially on large surfaces, it produces more consistent results than handheld tools. Vacuum thoroughly after each sanding stage to remove the dust.
Fine sanding with 180 to 220 grit prepares the surface for finishing. Finally, wipe the tabletop with a lint-free, slightly damp cloth to collect the remaining dust. Allow the wood to dry completely.
Choosing the right finish
Finishing protects the wood and enhances its appearance. For a natural look with visible grain, hardwax oil or linseed oil is suitable. It highlights the colour differences in the zigzag pattern. For a table that will be used heavily, a varnished surface is more durable.
Clear varnish protects against stains and moisture. Apply at least two, or preferably three, thin coats. Lightly sand between coats with very fine sandpaper (240 grit). This intermediate sanding creates a smooth final surface.
For a splash of colour, you can stain or glaze the strips in different shades before gluing them together. This creates a contrasting zigzag pattern. Always test colour combinations on scrap wood first.
How do I build a suitable base?
The base must support the weight of the often-heavy tabletop. The classic design uses four table legs connected by aprons. Attach the aprons to the underside of the tabletop with angle brackets or dowels.
Choose the shape of the legs. Straight, tapered or curved legs give the table a different character. The legs can be made from solid wood, or you can buy ready-made table legs and customise their colour.
Attach the legs so that they are set slightly back from the edge of the tabletop. This looks more elegant and is more practical, as you are less likely to bump into the legs. Measure carefully to prevent the table from wobbling later. A matching table lamp adds the finishing touch.
Table for indoors and outdoors
For use in the garden, all materials must be weather-resistant. Use treated wood or tropical hardwoods such as Bangkirai. The joints must be glued with special outdoor adhesive. Stainless steel screws (V2A or V4A) prevent rust.
Protect your finished garden table with a garden furniture cover. Transparent covers, such as those found in the transparent garden furniture covers category, allow the design to remain visible.
Do not leave the table outdoors permanently exposed to blazing sunlight or direct rain. A covered spot on the patio will extend its service life. Combine it with a practical automatic watering system for your plants.
Professional tools for perfect results
For ambitious DIYers, investing in specialist tools is worthwhile. The
(Handsappie) is a traditional yet extremely precise tool for marking and scoring wood. It transfers measurements and angles accurately.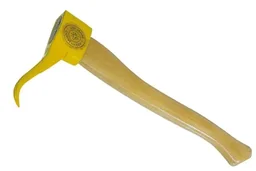
A
(120 W wet bench grinder) is ideal for sharpening and cool-grinding steel tools such as planer blades. Sharp tools are essential for clean cuts and a smooth wood surface.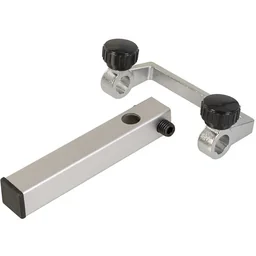
Use the
(leather polishing wheel) for the grinder to polish metal parts of your tools or, later, metal fittings on the furniture. The (round grinding wheel) is suitable for shaping curves or deburring.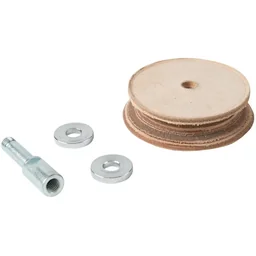
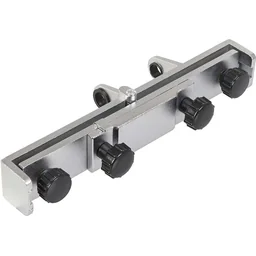
These tools complement your basic equipment. They help raise the quality of your DIY furniture to a professional level. Building a zigzag table is a challenging project that requires patience and care.
The result makes the effort worthwhile. You will have a one-of-a-kind piece that matches your ideas exactly. It will become a talking point in your home and may inspire further projects in the area of Patterns & Design.
Frequently Asked Questions
- Which wood is best for a zigzag table?
- Use hardwoods such as beech or oak for maximum stability and an attractive grain. Pine or spruce are also suitable for lighter tables or practice pieces. The important thing is that the wood is well seasoned and straight to prevent warping.
- How do I calculate the amount of material needed for the zigzag pattern?
- Sketch your pattern to scale. Calculate the total length of all the required strips by multiplying the number of zigzags by their length. Allow 15-20% extra for cutting errors and trimming the angles.
- Can I build the table for outdoor use?
- Yes, use weather-resistant wood such as larch or thermally treated wood. The joints must be glued with special waterproof adhesive. Protect the finished table with a garden furniture cover or a suitable outdoor stain.
- Which tools are essential for this project?
- Essential tools include a precise chop saw or mitre saw for the angles, a router with a guide rail for clean edges, a glue clamp and sanding equipment. A furniture dolly makes it easier to move the heavy tabletop.
- Is the zigzag pattern also suitable for children's furniture?
- Absolutely. The graphic design is perfect for children's furniture. Make sure the edges are rounded and use non-toxic paints or stains. The pattern encourages visual perception and makes the desk the highlight of the Musterwelten children's room.
You may also be interested in
- Build your own table: Guide to side tables and dining tables
- Build your own TV sideboard: Step-by-step guide
- Build your own furniture: Creative projects for your home
- Build your own corner bench: Step-by-step guide
- Build your own coffee table: A DIY project for your living room
- Build a table pyramid: DIY Christmas decoration from wood