
In brief: DIY storage shelves create useful space and save money. You’ll need wood or metal profiles, suitable fasteners, a jigsaw or handsaw, and a drill. Plan the dimensions carefully around your space and the items you want to store. Make sure the structure is stable and each shelf has enough load capacity.
Why build your own storage shelves?
Clutter in the basement or workshop wastes time and energy. A shelving system helps keep everything organized. Building one yourself has some real advantages.
You can tailor the dimensions to fit your space. An unused nook or narrow wall can become valuable storage space. Set the shelves to exactly the height and depth your belongings need.
You also get to choose the materials. Select the thickness of the wood and the type of connections to suit the weight you plan to store. Building your own shelves can also cost less than buying a complete system.
And there’s something satisfying about building your own shelving. A sturdy, handmade unit is a lasting result of your hard work.
The biggest saving when building your own shelving is not just the money, but the perfect use of space. A custom-made shelf uses every centimetre that a standard product would leave unused.
Which material should you choose: wood or metal?
Your choice of material affects the tools you need, the shelf’s stability and its appearance. Both options have advantages.
Classic wooden shelves
Solid wood or laminated wood panels are easy to work with. You’ll need a saw, a drill and screws.
Wood is forgiving if your measurements are slightly off. You can easily cut it shorter or reinforce it later. Its warm appearance suits a range of spaces.
One drawback is the limited load capacity when the span is over 80 cm. Without extra center supports, thin boards can sag. For heavy loads, choose plywood panels at least 22 mm thick.
Industrial metal shelving
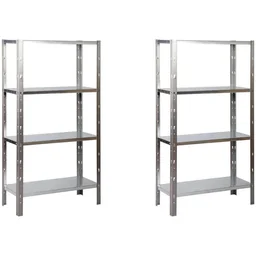
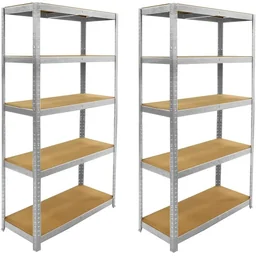
Assembly often requires special connectors or screws. A metal hacksaw or cordless cut-off grinder can come in handy.
Metal resists moisture and pests, making it a good choice for damp basements or garages. Its look is practical and industrial.
Pro tip
Combine the best of both materials: Build the frame from sturdy metal profiles and use 19 mm film-faced plywood for the shelves. This gives you high load capacity and a grippy, abrasion-resistant surface.
How do you plan your shelving?
Good planning helps prevent costly mistakes and frustration. Take a methodical approach.
Measure the available space carefully. Note the width, height and depth, and account for door swing and light switches.
Make a list of the items you want to store. Group them by size and weight. Keep heavy items you rarely need on the bottom shelves.
Choose the shelf depth. 30 cm, as in
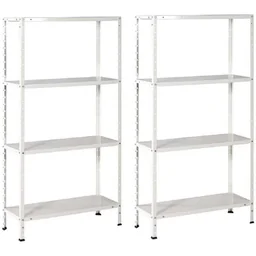
Sketch out your plan. Decide how many shelves you need and how high to place them. Leave a little extra clearance on each shelf.
Which tools do you need?
You won’t need much for a basic build. Power tools can help you work more precisely.
A jigsaw or circular saw cuts wood and thin metal profiles. Use a metal hacksaw for thicker pipes.
A drill is essential. Use wood drill bits for wood and metal drill bits for steel. A cordless screwdriver can make assembly much faster.
A folding ruler, spirit level and protractor help you mark straight, accurate lines. Clamps hold pieces securely as you work.
Keep safety in mind. Wear safety glasses when sawing and drilling. When working with metal, wear gloves to protect your hands from sharp edges.
Important note
Never overestimate the load capacity of shelves or wall anchors. A shelf that collapses under heavy items can cause significant property damage and seriously injure someone. Always leave a generous safety margin.
Step by step: Build a wooden shelf
Follow these steps to build a simple, sturdy freestanding shelving unit.
First, cut the side panels to size. These two boards form the left and right sides of the shelf. Their length determines the total height of the unit.
Next, cut the shelves to size. Each shelf should be the desired width minus twice the thickness of the side panels.
Mark the shelf positions on the inside faces of the side panels, using a spirit level to keep the marks straight. At each mark, drill pilot holes from the outside of the side panels.
Attach the shelves to the sides with heavy-duty wood screws. Tighten the screws firmly, but stop before the wood starts to crack.
Reinforce the structure. A back panel made from thin film-faced plywood helps prevent the shelf from wobbling. You can also add diagonal braces in the back corners to improve stability.
If you want adjustable shelf heights, a peg-hole system is a good option.
The most critical step is lining up the drill holes for the shelves. Use a template or drill guide to make sure the holes are parallel and at the same height on both side panels. This keeps the shelves level.
Step by step: Assemble a metal shelving unit
For products such as or , follow the instructions provided. To build your own shelving unit from profiles, follow these steps.
Cut the four vertical uprights to the desired height. Carefully remove any burrs from the cut edges.
Cut the horizontal connecting tubes to the required depth and width. These make up the frames for each shelf.
Join the tubes with suitable brackets and screws. For maximum stability, use through-bolted connections instead of simple support brackets.
Install the shelves. Perforated sheets or grating panels are often a good choice for metal shelving. They’re sturdy and allow plenty of airflow.
Anchor tall, narrow metal shelving units to the wall. Use suitable clamps for this purpose.
How do you securely attach the shelving unit to the wall?
Wall mounting is not optional; it is essential for safety.
Identify your wall type. A hammer drill is useful for solid masonry. For drywall, you need special hollow-wall anchors with sufficient load capacity.
Attach the shelving unit at the top. At least two mounting points are required. Use sturdy metal brackets and screw them to both the shelving unit and the wall.
For shelving units over 180 cm high, add a third mounting point in the center. This reduces swaying.
Carefully test the stability after tightening the screws. Pull the shelving unit gently toward you. It must not come away from the wall.
Additional advice
For heavy loads on drywall: do not install the anchors at random. Locate the vertical metal studs in the wall. These are normally spaced at 60-cm intervals. You can screw directly into the metal using special drywall screws to achieve the highest possible load capacity.
Optimal use: how to organize your storage space
A shelving unit is only as good as its organization. Systematize its contents.
Always store heavy items on the lowest level. This lowers the center of gravity and makes the shelving unit more stable.
Use transparent boxes with lids. They protect against dust and make the contents visible. Label the boxes on the front.
For small parts in the workshop, shelving baskets are ideal. They can be pulled out and keep screws and wall anchors organized.
Allow air to circulate. Do not place cardboard boxes directly against the back wall. This helps prevent mold, especially in the basement.
Adjust the shelf heights after initially filling the unit. There is often unused space above the boxes. Reduce the gaps to create an additional level.
For special requirements: alternative shelving concepts
Not every storage problem can be solved with standard shelving.
A special tire rack is suitable for tires or large rolls. It stores tires vertically while saving space.
In narrow hallways or workshops, wall shelves are ideal. They do not take up any floor space.
For flexible use in different rooms, build a shelving unit on casters. Use sturdy furniture casters with brakes. This makes the heavily loaded shelving unit mobile.
For a workbench with integrated storage, combine a robust base frame with a solid worktop. The compartments underneath can hold tools and materials.
Products such as show that even compact shelving units can offer a high load capacity. They fit into alcoves and behind doors.
Care and maintenance of your DIY shelving units
A well-built shelving unit can last for decades. Minimal maintenance extends its service life.
Check the screw connections regularly. Wood screws can become loose, especially during the first few months. Retightening them is usually sufficient.
Check the wall anchors once a year. Make sure no screws have come loose from the wall.
Clean dust and dirt from the shelves. After several years, you can treat wooden surfaces with a clear wood oil.
Never load the shelving unit beyond its intended capacity. If you are unsure, add a vertical center support or replace the shelves with stronger ones.
With this guide, you have the knowledge to take control of your organization. A DIY shelving unit is more than just storage space. It is a durable, personalized solution for your home.
Frequently asked questions
- Which wood is best for a DIY storage shelving unit?
- Solid softwoods such as spruce or pine are recommended for sturdy storage shelving units. They are affordable and easy to work with. For higher loads or damp rooms such as basements, treated lumber or plywood sheets are the better choice. Aim for a minimum thickness of 18 mm for the side panels and 22 mm for the shelves.
- How do I calculate the required load capacity for my shelving unit?
- Add up the weight of all the items you plan to store on each shelf. Allow plenty of leeway and add a 30% safety margin. A shelf for tools and paint cans should be able to hold at least 80 kg. For heavy equipment such as motors or crates of drinks, 150 kg per level is realistic. The total load capacity of the shelving unit is the sum of the capacities of all its shelves.
- Can I assemble a shelving unit without a drill?
- Yes, but with some limitations. For wooden shelving units, you can install pre-drilled angle brackets and screws using a cordless screwdriver. However, a drill is strongly recommended for precise holes for wall anchors or when working with metal profiles. Alternatives include slot-in systems for shelving uprights or pre-fabricated metal click systems that require few tools to assemble.
- What is the safest way to attach a tall shelving unit to the wall?
- Use sturdy wall anchors suitable for your masonry (e.g. expansion anchors for solid brick, frame anchors for drywall). Fit at least two wall brackets at the top of the shelving unit. For shelving units over 150 cm high, also secure the center. The fixings prevent the unit from tipping over and significantly increase its structural stability.
- How can I keep the spacing between shelves flexible?
- Use a hole pattern in the sides of the shelving unit. Drill holes 5 mm in diameter every 32 mm or 50 mm. Matching metal shelf support pins or clips support the shelves. This allows you to adjust the height at any time without dismantling the shelving unit. This solution is particularly practical in workshops and storage rooms.
You may also be interested in
- Build your own stacking rack: practical solutions for your home
- Build your own industrial shelving unit: step-by-step guide
- Build your own wooden shelving unit: complete step-by-step guide
- Build your own kids' shelving unit with boxes: creative storage solutions
- Build a plant shelf from pallets: DIY guide to garden furniture
- Build your own corner shelf: clever ways to use room corners