
In brief: Measure the space precisely and ensure adequate ventilation. Prepare the fridge by removing the transport locks. Slide the appliance into the cabinet, level it with a spirit level and secure it. Finally, fit the cabinet door according to the system used (sliding door or fixed door).
An seamlessly integrated fridge is the centrepiece of a modern kitchen. It disappears behind a matching cabinet door, creating a calm, uncluttered look. The good news is that you do not necessarily have to leave the installation to a professional. With careful planning, the right tools and this guide, you can fit your fridge yourself.
This guide takes you through every step—from measuring the space correctly and fitting the appliance to commissioning it. This ensures that your new appliance not only fits perfectly but also operates efficiently and safely.
Preparation is everything: the space, technology and right model
Before you reach for your tools, you need to plan. Measuring incorrectly or choosing the wrong door system can make the entire installation unnecessarily complicated. Take enough time for this step.
Measure the space precisely
An integrated fridge must fit the tall cabinet with millimetre precision. Measure the space at several points to identify any unevenness in the cabinet walls. Record the smallest measurements for height, width and depth. Compare these measurements precisely with the installation dimensions in the product description of your chosen appliance.
Correct ventilation is not an optional extra but a technical necessity. Heat building up behind the appliance inevitably leads to higher energy consumption and can drastically shorten the compressor's service life.
Essential: ventilation
A fridge generates heat at the back, and this heat must be able to escape. Integrated appliances are designed so that air circulates through the cabinet carcass. This requires an air inlet in the plinth area and an air outlet above the appliance. The minimum cross-sectional area for both openings is generally 200 cm². If these ventilation grilles are missing or blocked, the appliance will overheat. Check the manufacturer's specifications and make sure that your kitchen cabinet meets these requirements.
Fixed door or sliding door: which system is right?
There are two common systems for attaching the cabinet door to the fridge door:
- Fixed-door system: The cabinet door is mounted directly onto the fridge door. Both doors are firmly connected and move as one unit. This system is more stable and is often found on higher-end appliances.
- Sliding-door system: The cabinet door has its own hinges on the cabinet. It is connected to the fridge door by sliding rails. When opened, the cabinet door “pulls” the appliance door along with it.
Your kitchen cabinet must be suitable for the system you choose. Check whether hinges for a cabinet door are already fitted to the cabinet (sliding door) or not (fixed door).
Which tools and materials do you need to fit the fridge?
You do not need a specialist workshop to fit a fridge. A basic set of tools for DIY jobs is usually sufficient. Prepare the following tools and materials before you begin:
- Tape measure or folding rule: For measuring the space precisely.
- Spirit level: Essential for levelling the appliance.
- Cordless screwdriver: With suitable bits (Phillips, Torx) for all screwdriving work.
- Screwdriver set: For fine adjustments and setting the feet.
- Utility knife: For opening the packaging safely.
- Wood drill bit, if required: If you need to pre-drill holes for brackets.
Important note
Never work on the electrical connection while the fuse is switched on. Make sure the socket is disconnected from the power supply before connecting the appliance or working near the socket.
How do you fit the fridge step by step?
Have you prepared everything and got your tools ready? Then you can begin the actual installation. Work calmly and methodically.
Step 1: Prepare the work area
Clear the area around the cabinet to give yourself enough room to move. Clean dust and dirt from the space. Check that the socket is easily accessible and working. Cover delicate flooring with a blanket or cardboard to prevent scratches.
Step 2: Unpack and prepare the fridge
Remove the packaging carefully. Take care not to scratch the appliance's surface with the knife. Remove all transport locks from inside, such as tape securing drawers and glass shelves. Fit any handles or other components supplied with the appliance according to the instructions.
Pro tip
After transport, leave the new fridge standing upright for several hours before switching it on. This allows the refrigerant to settle in the compressor. Check the instruction manual for the exact waiting time—usually 2 to 4 hours.
Step 3: Slide the appliance into the space
Lift the fridge slightly and carefully slide it into the prepared space. Do not push it all the way back yet. Leave enough room to adjust the feet and fit the fixings. Make sure the power cable does not become trapped.
Step 4: Level the fridge
This is a crucial step. A fridge that is not level may prevent the door from closing properly and cause the appliance to use more energy. Place the spirit level on top of the appliance and adjust the feet until it is perfectly level. Then also check that the front edges are vertically aligned.
Step 5: Secure the appliance in the cabinet
Once the fridge is perfectly level, secure it to the cabinet carcass according to the manufacturer's instructions. This is usually done with screws through the brackets provided at the top and bottom. Tighten the screws firmly, but do not use excessive force, as this could damage the material.
Step 6: Fit the cabinet door
Fitting the door is the final major step and varies depending on the system.
- For fixed-door installation: Hold the cabinet door against the fridge door and secure it with the supplied brackets and screws. The manufacturer's instructions show the exact positions of the drill holes.
- For sliding-door installation: Fit the sliding rails to the inside of the cabinet door and to the fridge door. Hang the cabinet door on the cabinet hinges and connect the two doors using the rails.
After installation, check that the door opens and closes smoothly and that the gaps match those of the neighbouring cabinets. Adjust the hinges if necessary.
What are the most common mistakes, and how can you avoid them?
Even experienced DIYers make mistakes. When installing a fridge, the same problems often arise, but with a little foresight they are easy to avoid.
The most common mistake is ignoring the ventilation requirements. A fridge without air circulation is like a marathon runner in a plastic bag. It overheats, its performance drops and energy consumption rises dramatically. So always make sure the required ventilation openings are provided.
Another classic mistake is using the wrong dimensions. It is better to measure three times before ordering a fridge that ultimately does not fit into the housing unit. Do not forget to consider the depth, especially if pipes or cables run behind the cabinet.
Many DIYers underestimate the importance of precise levelling. Even a slight tilt can affect the door seal. Cold air escapes and warm air gets in, leading to ice build-up and higher electricity bills.
Additional advice
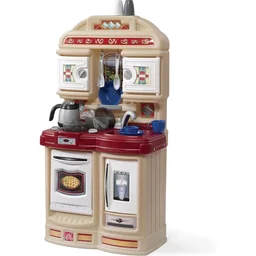
Planning a kitchen with the whole family? While you take care of the large appliances, the little ones can practise in their own play kitchen. This not only encourages creativity but also helps them understand how things work in the kitchen. Discover suitable children’s kitchens for aspiring master chefs. For example, the Cozy Play Kitchen with hob, oven and fridge
.
Some fridges, especially models with an ice dispenser, require a permanent water connection. Suitable appliance valves and professional installation are required for this. Plan this connection into your kitchen design from the outset.
The final steps: connecting and commissioning the fridge
The fridge is securely mounted and the door fits perfectly. Now it is time for the final steps. Plug the mains cable into the socket. Set the desired temperature according to the operating instructions. A medium setting is usually recommended to start with.
Now wait a few hours until the appliance has reached its operating temperature before filling it with food. This ensures that the cold chain is not interrupted. You can check the exact temperature with a special thermometer, such as the Digital Fridge Thermometer
.
For a small bar in the basement or a home office, a large integrated fridge is often overkill. A compact mini fridge is a better option, such as the Coca-Cola Mini-Fridge "MiniFridge15"
, which reliably keeps drinks and snacks cool.
Congratulations! You have successfully installed your integrated fridge yourself. Enjoy the neat appearance of your kitchen and the satisfaction of having completed this project with your own hands.
Frequently asked questions
- What is the difference between sliding-hinge and fixed-hinge systems?
- With a fixed-hinge system, the furniture door is attached directly to the fridge door, so both open as one unit. With a sliding-hinge system, the furniture door has its own hinges and is connected to the fridge door by a sliding rail, allowing the two doors to slide along each other.
- How much ventilation space does an integrated fridge need?
- Integrated fridges require a ventilation area of at least 200 cm². This is usually achieved with a ventilation slot in the plinth and clearance behind and above the appliance. Always follow the manufacturer’s specifications to prevent heat build-up and damage to the appliance.
- Can I install a standard freestanding fridge in a cabinet?
- No, you should not do this. Freestanding fridges release heat through their outer walls and require plenty of clearance. Installing one in a narrow cabinet can lead to overheating, high energy consumption and a shorter service life. Only use appliances specifically designed for integrated installation.
- How do I level an integrated fridge precisely?
- Use a spirit level on the top and along the inside edges of the appliance. Most integrated fridges have adjustable feet at the front and rear. Turn them with a screwdriver or spanner until the fridge is perfectly level both horizontally and vertically.
- What should I do if the fridge does not fit the housing unit exactly?
- If the housing unit is slightly too small, check whether parts of the cabinet can be adjusted. If it is too large, fill the gaps with accurately cut trim or panels to ensure a secure fit and a neat appearance. Measuring precisely before purchase is essential.
You may also be interested in
- Renovating a kitchen: planning, DIY & clever equipment
- How to organise your fridge properly: keep fresh food fresh for longer
- Fridge, hob, oven: choosing the right appliances for your kitchen
- Installing a front door: step-by-step guide for DIY enthusiasts
- Laying tiles and plastering walls correctly yourself – DIY guide
- Planning a fitted kitchen: functional & stylish kitchen design