
In brief: For a well-balanced display, hang pictures at eye level, align multiple frames along a shared line, and choose spacing that suits their size. Check the wall material, frame weight, and hanging hardware before drilling or driving in a picture nail. A paper template helps prevent misplaced holes and makes it easy to plan a picture grouping precisely.
For a well-balanced display, hang pictures at eye level, align multiple frames along a shared line, and choose spacing that suits their size. Check the wall material, frame weight, and hanging hardware before drilling or driving in a picture nail. A paper template helps prevent misplaced holes and makes it easy to plan a picture grouping precisely.
How do you plan a gallery wall?
A successful gallery wall starts with a plan, not a hammer. First, think of the wall as one connected surface and measure its width and height. Make a note of furniture edges, windows, doors, outlets, and existing lights.
Take a straight-on photo of the wall and review it on your phone or tablet. This makes it easier to see whether a large piece looks lost, a group feels too crowded, or the arrangement clashes with a piece of furniture. Consider the viewing angle, too: in the living room, you will mostly see the wall while sitting, whereas in a hallway you will usually see it while standing.
When choosing pictures for a wall display, plan the subjects, sizes, and frames together. Before you buy anything, decide whether you want the wall to feel calm, graphic, colorful, or deliberately eclectic.
Which subjects and frames work well together?
Start by coordinating the overall look. Landscape photography, botanical prints, and understated typography create a different effect from high-contrast art prints or family photos.
- A unifying color: Repeat one or two colors from the pictures, rug, or furniture.
- Matching frames: Black, white, or natural wood frames bring different pictures together and create a sense of order.
- Deliberate contrast: For example, pair a slim black frame with a wide wooden frame if you repeat that contrast elsewhere in the room.
- Complementary sizes: A large statement piece anchors the group. Smaller pictures complement it rather than competing for attention.
A consistent frame style creates a calm look, especially when the pictures already have lots of colors or details. With minimalist prints, different frame profiles can add more visual interest.
One picture or a picture grouping?
A single large picture works well above a sideboard, fireplace, or wide sofa. Choose a size with enough visual weight so it does not look like an isolated piece that was simply left there.
A picture grouping is ideal for long walls and personal collections. Imagine the frames enclosed within one rectangle. The overall dimensions should suit the furniture below; otherwise, the display can feel unbalanced.
Browse the wall decor category for inspiration in different styles. For ready-made designs and decorative accents, take a look at wall art.
“Art does not reproduce the visible; rather, it makes visible.”
What height should you hang pictures at?
As a starting point, place the center of the picture about 145 to 150 centimeters above the floor. This height is based on the average line of sight and works in many rooms. With low furniture, a seated viewing position, or a low ceiling, you can lower the center to 140 to 145 centimeters.
Above a sofa, sideboard, or bed, the distance from the furniture matters, too. A gap of 15 to 25 centimeters between the top of the furniture and the bottom edge of the frame is usually a good fit. Too much space makes the picture and furniture feel disconnected; too little can make the arrangement feel cramped.
How do you find the hanging point?
Measure the frame height and the position of its hanging hardware. A frame that is 60 centimeters high, with the desired picture center at 150 centimeters, starts at a height of 120 centimeters at the top edge. If the wire or sawtooth hanger sits eight centimeters below the top edge, mark the nail position at 112 centimeters.
- Measure the height and width of the finished frame.
- Mark the desired center point on the wall.
- Measure half the frame height up and down from that point.
- Measure the distance from the top edge of the frame to the hanging point.
- Mark this point on the wall and check its position with a spirit level.
For a picture grouping, find the center of the entire arrangement. Lay the frames out on the floor, including the planned spacing. The shared center is what matters, not the center of the largest picture.
What spacing looks balanced above furniture?
Between multiple frames, five to ten centimeters is a reliable guideline. Small pictures look compact with four to six centimeters of space, while large frames often need eight to twelve centimeters. Keep the spacing within a group as consistent as possible.
Above very low furniture, you can increase the gap slightly if the picture grouping would otherwise sit too low. Above a tall sideboard, the gap should be smaller. What matters is how the furniture and picture relate to each other, not following a rigid number.
Important note
Before drilling, check whether cables or pipes run through the wall. If in doubt, use a cable and pipe detector, and do not drill near outlets, switches, or water connections. Attach heavy frames only to a suitable wall surface and use wall anchors rated for the actual load.
What layout works best for your gallery wall?
The layout determines whether a gallery wall feels calm and balanced or busy and chaotic. Start by choosing a guiding principle and stick to it throughout. Matching outer edges or a clear centre line give frames of different sizes a cohesive look.
Which gallery wall layout is right for your space?
- Grid: Arrange frames of the same or similar sizes in horizontal and vertical rows. Even spacing and aligned edges create a clean, modern look.
- Centre line: Align the centres of several frames along a horizontal line. This works well on a long hallway wall or above a low sideboard.
- Top edge: Align the top edges of the frames and let the bottom edges finish at different heights. This looks relaxed while still feeling considered.
- Salon-style arrangement: Combine different sizes in a compact grouping. Keep the gaps small and use a larger picture as a focal point.
- Stepped line: Arrange the frames along a staircase or the rising edge of a piece of furniture. The bottom edges follow the line while the spacing stays even.
A grid requires precise measurements. For a salon-style arrangement, the overall outline matters more. Picture that outline on the wall and check that it works with the width of your sofa, sideboard or table.
How do you plan a gallery wall without making drilling mistakes?
Cut templates from packing paper or cardboard to match the size of each frame. Mark the hanging point on each template. Use painter's tape to attach the templates to the wall, then move them around until the arrangement looks right.
- Start with the largest or most important picture.
- Position the smaller frames around this focal point.
- Check the spacing with a tape measure.
- Step back two to three metres and view the grouping from the angle you would normally see it.
The templates also show whether a door, light switch or light fitting disrupts the composition. Remove them only once the outer edges and centre alignment look right. You can then browse all wall art to find pictures for a larger collection.
Pro tip
Photograph the wall with the templates attached from two to three metres away. Check the photo in black and white: if one frame stands out too much, change its size, spacing or frame colour before drilling any holes.
How do you hang picture frames securely?
The right fixing depends on the total weight of the picture, the frame and the wall material. Glass, a mount and a solid wooden frame can significantly increase the load. How you hang picture frames therefore affects not only their appearance, but also the wall's load-bearing capacity.
Which fixing is right for each wall?
For concrete and solid masonry, use a suitable wall anchor with a screw for heavier loads. A picture hanging nail may be sufficient for small, lightweight frames if the surface is solid and the hanging hardware is suitable.
- Concrete: Use a suitable wall anchor and drill with the correct bit. Remove drilling dust before inserting the anchor.
- Brickwork: Drill into the brick rather than a crumbling mortar joint wherever possible. Choose the anchor and screw based on the wall material.
- Drywall: A simple nail will only support lightweight frames. For heavier loads, use an approved hollow-wall anchor or attach the frame to a load-bearing support structure.
- Plaster and wallpaper: Check that the surface is firmly attached. Crumbling plaster or loose wallpaper does not provide a reliable base.
Adhesive hooks can provide a drill-free solution on smooth, load-bearing surfaces. Follow the manufacturer's instructions, clean the surface and do not test the adhesion on valuable pictures. Textured wallpaper, damp rooms and delicate paint finishes increase the risk of detachment.
What steps help when hanging picture frames?
- Check the weight: Weigh the finished frame, including the glass and hanging hardware. Do not estimate the load based on size alone.
- Check the hanging hardware: Make sure the wire, D-rings, sawtooth hangers and mounting screws are secure. Repair any loose parts before hanging the frame.
- Choose the wall fixing: Based on the wall material, weight and manufacturer's instructions, choose between a picture hanging nail, a screw with wall anchor or a special bracket.
- Transfer the position: Mark the hanging point from your template or measurements. Check the height and horizontal alignment.
- Level the frame: Hang the picture, check it with a level and, if necessary, place small felt pads on the bottom corners.
Which picture hanging nails are suitable for lightweight frames?
The nail length must match the frame, hanging hardware and wall surface. A short picture hanging nail is suitable for shallow, lightweight frames on appropriate walls. A longer version may be useful for a deeper hanging point or a larger frame, but it does not replace the right wall anchor for heavier loads.
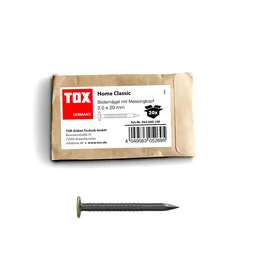
- Home Classic picture hanging nail with brass head, 2.0 x 20 mm, for lightweight, shallow frames on suitable wall surfaces.
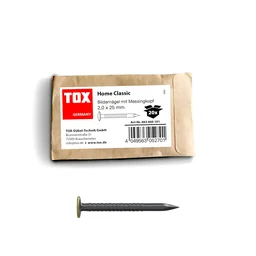
- Home Classic picture hanging nail with brass head, 2.0 x 25 mm, a slightly longer option for suitable frame hanging hardware.
- Home Classic picture hanging nail with brass head, 2.0 x 30 mm, for frames with a larger gap between the hanging hardware and the wall.
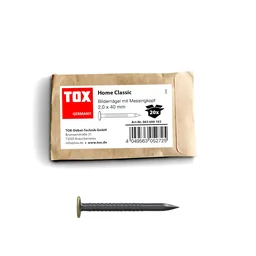
- Home Classic picture hanging nail with brass head, 2.0 x 40 mm, for suitable wall surfaces and deeper hanging points.

Additional advice
Whenever possible, hang wide or heavy frames from two fixing points. A second hanging point distributes the load, prevents twisting and keeps the top edge more level. For valuable pictures or uncertain masonry, a sturdy picture rail is worth considering.
How do you protect the wall and frame?
Felt pads on the lower corners of the frame prevent it from touching the wall and leaving marks when you adjust it. Avoid direct sunlight if prints or photographs could fade. In damp rooms, frames and backing boards need sufficient clearance from moisture.
After a few days, check whether the frame has tilted or the fixing has loosened. With wire hangers, the centre of gravity is not always in the middle. Adjust the wire and the two fixing points before the picture shifts permanently.
How do you use pictures in the living room and other rooms?
When hanging pictures in the living room, align the arrangement with the sofa, sideboard, or TV stand. The gallery wall should be about two-thirds the width of the furniture. This creates a clear visual connection without the frames extending to the edges.
How can you create an attractive wall above the sofa?
As a general rule, hang the bottom edge of the gallery wall 6 to 10 inches above the back of the sofa. With a low sofa, the gap can be smaller. Choose a central focal piece for the arrangement or align all the frames along a shared center line.
A single small picture can quickly look lost above a large sofa. Instead, combine several sizes or choose a large-format print. Watch out for reflections if a light or window shines directly onto the glass and frame.
What changes in the bedroom, hallway, and dining area?
In the bedroom, soothing colors, landscapes, abstract designs, and personal photographs work well. A gallery wall above the bed should be securely mounted and leave enough space above the headboard. A wide frame or triptych can match the width of the bed.
In the hallway, maintaining a consistent center height helps, even when the wall is narrow. Arrange several small frames along the same line and keep doors, the coat rack, and walking areas clear. In the dining area, you can use bolder colors, but protect the frames from grease, steam, and bumps.
How can you hang pictures safely in a child's room?
In a child's room, lightweight frames, shatter-resistant materials, and secure mounting hardware are essential. Hang glass pictures out of the reach of small children and avoid sharp frame edges above play or sleeping areas. You can find suitable pictures for children's rooms.
Choose designs that can easily be supplemented later. A small gallery wall with matching frames can grow with the room and be rearranged when needed. Secure each picture individually, even if it is part of a lightweight decoration.
“Color is a means of exerting a direct influence on the soul.”
What should you check after hanging the pictures?
- Are all the frames straight, with the intended edges aligned?
- Can you still clearly see the spaces between the pictures from a greater distance?
- Does the width of the gallery wall suit the sofa, sideboard, bed, or available wall space?
- Is any frame covering outlets, switches, radiators, or important light sources?
- Is every mounting point secure, and is no frame touching a door, window, or frequently used walkway?
Assess the wall from the usual seating or walking area, both in daylight and in the evening. When the frames, designs, spacing, and lighting work together, the arrangement looks intentional while remaining personal. This preparation is what makes hanging pictures precise, safe, and visually appealing for the long term.
Frequently asked questions
- What height should I hang a picture at?
- As a general rule, position the center of the picture 57 to 59 inches above the floor. Above a sofa, sideboard, or bed, the distance from the furniture is what matters: 6 to 10 inches usually looks balanced. For a gallery wall, treat all the frames as one overall image and measure its center.
- How much space should there be between several pictures?
- As a general rule, allow 2 to 4 inches between neighboring frames. Small formats look compact with 1.5 to 2.5 inches, while large frames generally need 3 to 5 inches. The overall effect is what matters: equal spacing connects the designs, while larger gaps separate themes or deliberately create a sense of calm.
- How can I hang pictures without drilling?
- Only use adhesive strips or hooks on sound, smooth, clean, and dry surfaces. Check the manufacturer's information for the weight limit and frame type. Adhesive solutions are more likely to fail on textured wallpaper, damp plaster, crumbling surfaces, or delicate wallpaper. For valuable or heavy pictures, mechanical mounting remains the safer option.
- Which pictures work well in the living room?
- In the living room, choose designs that complement the colors and style of the furniture. A gallery wall above a sofa looks harmonious when it reaches about two-thirds of the sofa's width. Abstract art, photographs, and graphic prints can be mixed as long as the frame color, spacing, or color palette provides a common link.
- How can I hang several pictures without drilling in the wrong places?
- First arrange the frames on the floor or use paper templates. Establish a shared center line or outer edge and keep the spacing consistent with a tape measure. Mark every hanging point before drilling. This lets you assess the proportions early and avoid unnecessary holes in the wall.
You might also be interested in
- Creative wall decor: Beautify your rooms with decorative elements
- Bedroom wall decor: Ideas for peace and coziness
- Room design: Tips for a harmonious home
- Painting a wall a new color: Top tips for the perfect color scheme
- How to hang wallpaper murals: Create your dream wall step by step
- How to install wall cabinets correctly