
In brief: You can lay tile in six steps: check and prepare the surface, set the tile, apply grout, and let it dry. Success depends on a level, stable, clean surface. Wet areas such as bathrooms need waterproofing. Use the right installation method and tools for the job.
How to Lay Tile: Here's How
A properly prepared surface is key to a successful tiling project. Check that it is level with a long spirit level or straightedge. Use leveling compound to correct differences of more than three millimetres over two metres.
Remove loose material, dust, and grease, then vacuum thoroughly. Apply a penetrating primer to absorbent surfaces such as screed or masonry. This helps the adhesive bond.
Important note
Wet areas such as showers and the spaces around bathtubs must be waterproofed in accordance with DIN 18534. Never lay tile directly on an unwaterproofed floor slab or shower pan. Moisture can damage the subfloor.
Different rules apply to gardens and balconies. Outdoor tile must be frost-resistant and installed on a stable, well-drained base. Find suitable materials in the Garden + Outdoor section.
What Tools Do You Need to Lay Tile?
Good tools make the job more precise and faster. You won't need an extensive setup. Find many of the tools you need in the Power Tools category.
A tile cutter makes clean cuts in ceramic and porcelain tile. For complex cuts or hard materials such as porcelain tile, a wet saw is a good choice. It produces little dust and delivers precise results.
A notched trowel spreads adhesive evenly. Choose the notch size to match the tile size: larger tiles need larger notches. Use a rubber mallet to adjust each tile gently.
Pro tip
Always mix tile adhesive according to the manufacturer's instructions. Use clean water and a drill mixer set to a low speed. The mixture should be creamy and lump-free. Mix only as much as you can use within 20 minutes.
Plastic tile spacers keep grout lines even. Remove them once the adhesive has set. Later, use a rubber grout float to work grout neatly into the gaps.
How Do You Lay Tile Correctly?
Start by planning the layout. Dry-lay the tile to decide where to begin. Avoid narrow cut pieces along visible edges. In many cases, it's best to center the layout in the room. Use a straightedge to mark your starting lines.
The first row of tile sets the layout for the whole project. Take your time and align it carefully. A small mistake at the start can grow by the time you reach the last row.
Apply tile adhesive to the surface in sections. Spread it with the notched side of the trowel. The ridges help the tile bond securely. Set each tile in place with a slight twisting motion.
Press each tile down firmly and tap it into place with the rubber mallet. Check that it is level with the spirit level, then insert tile spacers. Work one row at a time. Wipe away adhesive residue right away with a damp sponge.
Products such as the
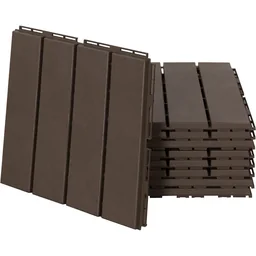
What Role Do Grout Lines and Grout Play?
Grout lines do more than separate tiles. They allow for movement in the surface and the tile. Without grout lines, tiles would press against each other and crack as temperatures change. The grout line width depends on the tile size.
Large-format tile measuring 60 centimetres or more needs grout lines at least three millimetres wide. Smaller tile can use two-millimetre grout lines. Choose wider grout lines outdoors to allow for greater movement.
Wait for the tile adhesive to dry completely. This takes at least 24 hours. Then clean the grout lines thoroughly, removing dust and adhesive residue. Mix the grout.
Additional advice
Choose your grout color carefully. Light gray or beige grout creates a harmonious look and is easy to maintain. White grout shows dirt more quickly. Dark grout makes the tile outlines stand out. Test the look in a small area first.
Use the rubber grout float to spread grout diagonally across the grout lines. This helps fill them completely. Remove excess grout right away. Once the grout starts to dry, wipe the surface with a damp, well-wrung sponge.
Protect the freshly grouted surface from drafts and direct sunlight. The grout needs consistent conditions to set properly. After about two weeks, you can seal the tile with a neutral care product to help protect it from stains.
What Is the Difference Between Wall Tile and Floor Tile?
Floor tile is thicker and more durable. It must withstand concentrated loads from furniture and foot traffic. Slip resistance is an important factor. In wet rooms, choose at least class R9.
Wall tile is lighter and thinner. It doesn't need to be rated for foot traffic, and it can come in larger sizes. Pay attention to the weight. Heavy natural stone slabs need special adhesive and often an additional support structure.
In the Bathroom, you'll often use both types. Floor tile should offer greater slip resistance. Wall tile can have a decorative size or pattern. Align the grout lines on the floor and wall for a calm, cohesive look.
Products such as
are a special case. Foam tiles provide a comfortable surface in workshops or fitness areas. They install without adhesive or grout using a tongue-and-groove system.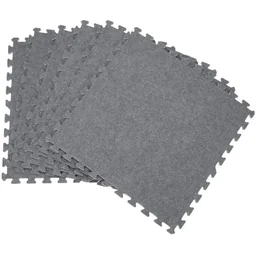
The biggest mistakes come from rushing or combining the wrong materials. Adhesive for standard ceramic tile won't hold porcelain tile. Grout made for indoor use will flake outdoors. Read the product data sheets.
Modern tile trends for kitchens and gardens
Large-format tiles dominate the market. Tiles measuring 60 by 120 centimeters or larger create seamless surfaces. They require a perfectly prepared substrate and often two people to install. The grout lines are barely visible.
Natural looks remain popular. Wood-, concrete- and marble-effect porcelain tiles are durable and easy to maintain. They replicate the original materials with remarkable realism. One example is a tile with a wood-grain finish.
In kitchens, backsplash tiles are becoming increasingly popular. They are easy to clean. Mosaics or colorful accent strips add personality. Combine hard-wearing floor tiles with decorative wall tiles.
For outdoor areas, through-body porcelain tiles are ideal. They are frost-resistant, slip-resistant and weatherproof. Install them on a slope of at least two percent. This allows water to drain away safely.
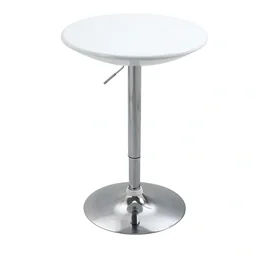
Matching furniture such as the height-adjustable
Caring for and maintaining your new tiles
At first, clean newly laid tiles with water only. Wait several weeks before using mild, pH-neutral cleaners. Harsh acids or abrasive cleaners can damage natural stone and grout.
Seal the grout regularly to prevent moisture and dirt from penetrating. This is especially important in kitchens and bathrooms, where it can help prevent mold. Use a grout sealer spray.
Remove stains right away. Fresh kitchen grease and bathroom soap residue are easier to clean. For stubborn grout deposits, use a steam cleaner. Test it first in an inconspicuous area.
Check outdoor grout every year. Weather can put considerable strain on it. Replace crumbling or cracked grout promptly. This prevents water from getting underneath the tiles and causing frost damage.
With the right preparation, suitable tools and a little patience, you can lay modern tiles yourself. The result is a durable, attractive surface for your home. For all the materials you need, take a look at our extensive store.
Frequently asked questions
- What kind of surface do I need before laying tile?
- The surface must be completely level, clean, stable and free of dust or loose material. Plaster or drywall needs a primer. In wet areas such as bathrooms, professional waterproofing in accordance with DIN 18534 is essential before you lay the tiles.
- What tools do I need to install tile?
- You need a notched trowel for the tile adhesive, a tile cutter or wet saw, a rubber mallet, tile spacers and a rubber sponge. You will need a rubber grout float to apply the grout. A straightedge and level are essential for keeping the tiles straight.
- How do I figure out how many tiles I need?
- Measure the area to be tiled in square meters. Add around 10% for waste with standard tile patterns. For diagonal layouts, lots of cuts or intricate patterns, allow 15%. Buy all your tiles from the same batch to avoid color variations. You can find a range of tile sizes in our store.
- Can I install tile over existing tile?
- It is possible, but not always advisable. The existing tiles must be firmly bonded and able to support the additional load. Clean the old tiles thoroughly, roughen the surface and apply a suitable bonding primer. Keep in mind that the floor level will rise, so door thresholds and baseboards may need adjusting.
- How long does tile adhesive take to dry?
- Drying time depends on the product, substrate and room conditions. In most cases, you can walk carefully on the tiles after 24 hours. The adhesive often takes several days to reach its full load-bearing strength. Wait at least one week before using a newly tiled bathroom. Always follow the manufacturer's instructions.