
In brief: Roof underlayment protects the roof structure and insulation from moisture and wind. Install the membrane horizontally, starting at the eaves and working toward the ridge, with 10-15 cm overlaps. Secure it to the rafters and carefully seal every joint, connection, and penetration with compatible roofing tape. This creates a second layer that drains water away and helps maintain energy efficiency.
A watertight roof is essential for a dry, energy-efficient home. Whether you’re renovating your roof or building a new home, roof underlayment plays a crucial role. It’s more than a simple sheet: it forms a second water-shedding layer beneath the roof tiles, protecting the insulation and timber structure from moisture, dirt, and wind. A well-built roof structure with properly installed roof underlayment is an investment that helps prevent structural damage and reduce heating costs.
Table of contents
What is roof underlayment, and why is it so important?
Think of roof underlayment as a high-performance raincoat for your home. It sits directly on the rafters, beneath the counter-battens and roof battens that will later support the roof tiles. Its main job is to repel moisture that gets past the roof covering, such as wind-driven rain or drifting snow. It safely channels water to the eaves and into the gutter.
It also serves a second, equally important purpose: keeping the roof windproof. A continuous layer of roof underlayment prevents cold outside air from entering the insulation and reducing its effectiveness. Modern membranes are also vapor-permeable, or “breathable.” This means moisture from inside the house and roof structure can escape to the outside. That helps prevent condensation and reduce the risk of mold and structural damage.
How do you choose the right roof underlayment?
There are many types of roof underlayment to choose from. The right one depends on the membrane properties your building project requires. Compare the key specifications and materials to find the best option for your roof.
The sd value: Measuring breathability
The most important specification is the sd value (equivalent air layer thickness for vapor diffusion). It indicates how much a membrane slows the passage of water vapor. A low sd value means higher vapor permeability.
- Vapor-permeable membranes (sd value < 0,5 m): These are now standard for most insulated roofs. They allow moisture to escape from the insulation and are ideal for a conventional roof structure.
- Vapor-control membranes (sd value 0,5 m – 1500 m): These are installed on the warm, or inner, side of the insulation to limit how much indoor moisture enters the structure.
- Vapor-tight membranes (sd value > 1500 m): These vapor barriers are used in specialized construction, such as flat roofs or saunas.
For roof underlayment installed outside the insulation, you will almost always choose a vapor-permeable membrane.
A breathable roof underlayment membrane with an sd value below 0,3 m is standard today. It allows moisture from the insulation and timber structure to dry safely to the outside, helping prevent structural damage such as mold and rot.
Materials and features
Roof underlayment is usually made from multilayer plastics such as polypropylene (PP) or polyester (PES), with a special functional membrane. Look for high tear resistance, especially when working on the roof. Integrated adhesive strips along the edges are another useful feature. They make it easier to seal overlapping sections and create a secure, windproof connection without additional tape.
Step-by-step guide: How do you install roof underlayment?
Proper installation is essential for the membrane to work as intended. Take your time and work carefully. Safety should always come first.
Important note
Working on a roof is dangerous. Make sure you have a stable, secure work platform, such as scaffolding. Wear safety shoes with nonslip soles and use fall protection. Never work on a roof in strong winds or rain.
Preparing the roof structure
Prepare the roof structure before you begin. The rafters must be clean and free of sharp edges and protruding nails. Remove old battens and nails completely. Check the timber for damage and repair it as needed before installing the membrane.
Installing from the eaves to the ridge
Always start at the lowest edge of the roof, the eaves. Roll out the first section of membrane parallel to the eaves. It should extend a few centimeters over the eaves flashing so water can drain safely into the gutter. Align the membrane carefully and keep it taut without stretching it too tightly.
Securing and overlapping
Temporarily fasten the membrane to the rafters with a staple gun. Place the staples where they will be covered by the next overlapping section. The counter-battens will provide the permanent fastening later. Install the next section higher up, overlapping the lower one by 10-15 cm. Most membranes have printed lines to help you get the overlap right.
Pro tip
Pay close attention to the overlap markings. If the membrane has integrated adhesive strips, leave the protective backing on until the membrane is in the right position. Then press the joint firmly with a pressure roller to create a lasting watertight seal.
Sealing joints and penetrations
The most critical step is sealing every connection and penetration, including chimneys, roof windows, and ventilation pipes. Use the manufacturer’s compatible system of highly elastic adhesive tapes and sealing collars. Cut the membrane to fit precisely, then carefully seal the edges in multiple layers to the roof surface and around the penetration. This is the only way to create a continuous, watertight layer.
What mistakes should you avoid when installing roof underlayment?
Small installation mistakes can have major, costly consequences. Avoid these common problems to make sure your roofing stays protected.
- Installing it with the wrong side facing up: Roofing underlayment membranes have a top and bottom side. The durable, often coated or printed side must face outward.
- Not overlapping the sheets enough: Follow the overlap specified by the manufacturer. If the overlap is too small, water can seep underneath the membrane through capillary action.
- Leaving seams untaped or using the wrong tape: Untaped seams are not watertight. Use only the manufacturer's system tapes, as other tapes may not stay bonded over time.
- Letting the membrane sag: Pull the membrane taut. Folds or pockets can collect water and put stress on the material.
- Leaving damage unrepaired: Carefully seal any small tears or holes caused during installation right away with suitable repair tape.
Additional advice
After installing the roofing underlayment and the interior vapor control layer, you can have the building envelope's airtightness checked with a blower door test. This can identify leaks before the final roofing is installed.
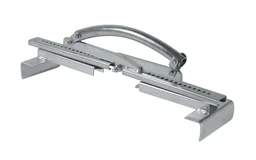
Insulating a house involves many individual steps, and the right tools are essential throughout the project. This applies to fastening materials as well as transporting them. The
What comes after the roofing underlayment? The rest of the roof structure
Installing the roofing underlayment is an important step, but the job isn't finished yet. The next stages add stability and create the ventilation gap the roof needs.
Counter battens and ventilation
Screw the counter battens firmly into place directly over the roofing underlayment, along the rafters. These wood battens, usually 30-50 mm thick, hold the underlayment in place and create an essential gap between the membrane and the roofing. This gap forms a ventilation layer, allowing air to circulate and carry away moisture that has seeped through the roofing or passed through the membrane.
Roof battens and roofing
Attach the roof battens across the counter battens. Their spacing depends on the type and size of the roof tiles or concrete tiles you're using. The roofing is then hung and secured to these battens. For the job, you'll find suitable power tools and other workshop supplies in the Westfalia range. Our selection of tarps + netting also offers solutions for a wide range of covering jobs.
Professional construction of the under-roof is crucial to the reliable performance of the entire roof structure. Only the combined use of the roofing underlayment membrane, counter battens, and roofing provides lasting protection from the elements.
Once the roof is insulated and covered, the attic becomes valuable extra space. In summer, insects often seek out warm, undisturbed areas, so a trap can help keep them away. The
electronic UV insect trap MK06, twin pack helps keep your new attic peaceful. You'll also need to plan the roof drainage system. Find suitable components in our house drainage pipe system section.
Properly installed roofing underlayment is an unseen hero. It helps your roof last longer, lowers energy costs, and makes your home more comfortable. With careful planning and quality workmanship, you can protect your home for decades.
Frequently asked questions
- What's the difference between roofing underlayment and a sarking membrane?
- In the past, roofing underlayment was suspended freely between the rafters. A sarking membrane was laid directly on a solid base, such as insulation or wood sheathing. Today, the terms are often used interchangeably because modern membranes are usually suitable for both installation methods.
- Can you install roofing underlayment from the inside?
- No. Roofing underlayment must be installed on the outside of the rafters as the second water-shedding layer, directly beneath the counter battens. Installing it from the inside won't protect against moisture coming in from outside. Vapor control layers are installed on the inside for that purpose.
- How much should roofing underlayment overlap?
- The overlap should be at least 10 to 15 cm. Most manufacturers print guide marks on the membrane to make alignment easier. A larger overlap may be a good idea on low-pitch roofs or in areas with heavy snowfall.
- Which side of roofing underlayment faces up?
- Most roofing underlayment membranes have a coated or printed top side and a fleece-like underside. The printed, more durable side should always face outward, toward the roofer. If you're unsure, check the product manufacturer's instructions.
- Does roofing underlayment need to be taped?
- For a wind-tight, rainproof installation, tape all overlaps, seams, and connections. Use only the system tapes and sealants recommended by the manufacturer. Many modern membranes have built-in adhesive strips that make installation easier.
You may also be interested in
- Install your own between-rafter insulation: Here's how
- Insulate your roof: Save on heating costs and improve comfort at home
- Insulate your home yourself: Money-saving tips and a guide for DIYers
- Insulate your attic yourself: Costs and best methods
- How to install corrugated metal roofing correctly
- Roof construction for DIYers: Your complete renovation guide