
In brief: Liquid screed is a self-leveling cement screed poured in a fluid state. Its biggest advantages are fast, even installation and excellent coverage around radiant floor heating pipes. Its drawbacks are longer drying times and higher material costs than dry screed. It works best for large, level areas and new construction.
Liquid Screed: Pros, Cons & Drying Time
Planning a new floor system? Liquid screed is a modern option that can save time and effort. This self-leveling screed is especially well suited to radiant floor heating. Here’s a look at its main benefits and drawbacks.
Pro tip
Plan for drying time from the start. Installing flooring too soon can ruin your investment. Allow at least one week per centimeter of screed thickness.
What is liquid screed?
Liquid screed is a cement-based screed with special additives that give it the consistency of thick yogurt. It’s applied to the prepared surface using a hose or pump.
The screed spreads on its own to create a level surface. It’s also known as self-leveling screed and eliminates the labor-intensive step of smoothing the surface with a straightedge.
What is liquid screed made of?
The basic ingredients are cement, sand and water. Flow agents and air-release agents are key. They reduce the amount of water needed and prevent voids, resulting in a dense, strong screed.
The quality of liquid screed depends on precisely measuring the additives. Too much water reduces its strength, while too little keeps it from flowing properly.
The main advantages of liquid screed
Why do so many builders choose this option? Its practical benefits speak for themselves.
Fast, easy installation
You can cover large areas in a short time. One crew can install several hundred square meters a day. The work is less physically demanding than installing traditional screed. Pumping the material saves time and reduces the need to move it by hand.
Its self-leveling properties create a smooth, even floor system. You get a level surface with no hollows or changes in height, making it an ideal base for any type of flooring.
A great fit for radiant floor heating
This is the main reason liquid screed is so popular. It flows completely around the heating pipes, leaving no gaps that could act as a barrier to heat.
Heat transfers more efficiently from the pipes into the room, helping you save energy over time. The even surface provides comfortable radiant heat without cold spots.
Important
Pressure-test the radiant floor heating system and check for leaks before installing the screed. Any damage found later could mean tearing up the entire floor. This step is essential.
Strong and durable
Liquid screed can achieve high compressive strength, making it suitable for commercial areas and busy living spaces. Its uniform structure, without voids, resists concentrated loads.
It also creates a dense barrier against moisture rising from below. Combined with a suitable moisture barrier, it helps protect your building. This can be useful for many projects in the Garden + Outdoor category, such as covered patios connected to the house.
Drawbacks and limitations of liquid screed
No building material works for every application. Liquid screed also has properties that may affect your project.
Long drying time
This is its biggest drawback. The screed drying time is about one day per millimeter of thickness before it’s ready for flooring. At 5 cm thick, that’s 50 days. During this time, keep moisture away from the screed.
This can significantly delay your project. Other trades may have to wait, too. Mechanical drying can speed things up, but it adds to the cost.
Heavy weight and structural requirements
Liquid screed is heavy. A 5 cm-thick layer weighs about 100 kg per square meter. Your floor or ceiling structure must be able to support that load.
In older buildings, a structural assessment is essential. Wood joist floors may need reinforcement. Lighter options, such as dry screed, can be a better fit.
Planning for liquid screed starts with a structural assessment, not at the job site. Overlooking its weight can become the costliest mistake.
Higher material costs
Special additives and a more complex production process make liquid screed more expensive than conventional cement screed. The higher price covers easier installation and a smoother surface.
Expect material costs to be 20-30% higher. You’ll also need to factor in the cost of pumping equipment. A complete cost comparison should account for the labor time saved.
Not suitable for sloped surfaces
Liquid screed finds its own level, so you can’t use it to create specific slopes, such as those needed for curbless showers or patio drains. For that, you need screed that can be shaped by hand.
For projects that require drainage, such as those in the Plumbing + Irrigation category, liquid screed is usually not the right choice.
More advice
Have a professional install the screed. The mix, installation timing and aftercare all affect the result. Mistakes made by an inexperienced installer can be difficult to fix.
How to build up a floor, step by step
What does a good floor system look like? Here are the main layers, from bottom to top.
1. The structural base
A concrete slab, masonry or existing screed forms the base. It must be clean, solid and free of release agents. Remove loose material and vacuum the surface thoroughly. A primer can help the next layer bond.
2. The separation and insulation layer
A PE film helps keep moisture from rising. Install impact sound insulation made from rigid foam or mineral wool on top. This layer separates the screed from the building structure and reduces footfall noise.
3. The edge insulation strips
Attach insulation strips along every wall and fixed structural element. They allow for the screed’s thermal expansion and prevent pressure damage. They’re essential.
4. The liquid screed
Now apply the liquid screed. The thickness depends on the load and the radiant floor heating system. The screed must cover the heating pipes by at least 3.5 cm. The total thickness is often between 5 and 8 cm.
5. Aftercare
For the first few days, protect the screed from drafts and rapid drying. Covering it with plastic sheeting is standard practice. Once it has initially hardened, start moistening it carefully to reduce the risk of cracks.
Installing liquid screed: what professionals do
What should you expect from a good screed installer? They’ll pay attention to details that can save you trouble later.
They’ll measure the moisture in the substrate. An overly damp surface can extend the new screed’s drying time. They’ll also check the room temperature. A consistent 15-20°C is ideal during installation and drying.
A professional calculates the exact amount needed ahead of time. Mixing more material during installation can lead to inconsistencies. The crew coordinates mixing, pumping and spreading.
After installation, they leave the area right away. Footprints in fresh screed will remain visible. Keep people off the job site during the drying phase.
Screed drying time: the critical phase
Patience is essential at this stage. The chemical reaction in the screed binds the water, and this process takes time.
What to do while the screed dries
Keep the room temperature constant. Avoid excessive heating or ventilation. The aim is to remove moisture slowly and evenly. Keep the surface out of direct sunlight.
Protect the screed from rain and moisture rising from the ground. When renovating an existing building, watch for moisture from adjoining rooms. A good screed contractor will monitor the process and let you know when the screed is ready.
When is the screed completely dry?
Use the CM test to check whether the screed is ready for floor coverings. A special device measures the residual moisture in the screed core. For cement screed, the limit is 2.0 CM-% for all floor coverings except textiles.
Only once this value has been reached can you switch on the underfloor heating for the first time. The heating system should be commissioned gradually over several days. Switching it on too early can cause the screed to crack.
Liquid screed vs. dry screed: a direct comparison
Which method should you choose? Use this guide to help you decide.
Choose liquid screed for new-build projects with underfloor heating, large level areas without a slope, or when you need a highly accurate finish.
Choose dry screed for renovations where the floor has limited load-bearing capacity, when you need to continue work straight away, or for small rooms and uneven subfloors. You can also find dry systems in our range of business supplies and other trade supplies.
Products to help you prepare for your building project
Every building project starts with good planning and preparation. These products can help with preparatory work on your property or with storing materials.
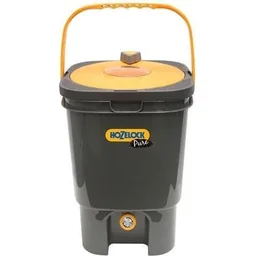
: The 5 kg fast-action compost activator helps you put organic waste from your building site or garden to good use. It reduces the waste's volume and later produces nutrient-rich compost for your outdoor spaces.: With a capacity of 160 liters, this 2-chamber tumbler composter is ideal for larger properties. While you fill one chamber, finished compost for your gardening projects matures in the other.: The 19-liter BioMix composter is a compact solution for kitchen and garden waste. It makes it easy to handle organic waste sustainably, even while your building project is underway.

For other materials and tools for outdoor work around your building project, visit our garden tools category.
Conclusion: the right choice for your project
Liquid screed is a high-quality solution for demanding floor constructions. Its key advantages are a perfectly level surface and easy integration with underfloor heating. The added convenience of installing screed often justifies the extra cost.
However, you need to allow for the long screed drying time in your building schedule. Carefully check the structural requirements in existing buildings, and hire an experienced specialist contractor with a proven track record.
For standard renovations without underfloor heating, or where floor height is limited, consider alternatives such as dry screed. The right floor construction can affect your home's comfort for decades. Take the time to choose quality and make an informed decision.
Frequently Asked Questions
- How long does liquid screed need to dry before I can install flooring?
- Liquid screed takes around 1 day per cm of screed thickness to dry at 20°C and 65% humidity. For a 5 cm thick layer, you should therefore allow at least 5 weeks. You should only gradually bring underfloor heating up to temperature once the screed has dried completely. Use a CM moisture test to measure the residual moisture content before installing flooring.
- Can I use liquid screed in an older building?
- Yes, liquid screed is also suitable for older buildings, but it requires thorough preparation. The existing floor must be fully load-bearing, clean and free of loose material. You must install an effective separation and insulation layer. Check the structural integrity, as liquid screed is heavier than dry screed. The available height at doorways is a critical factor.
- How much does liquid screed installation cost per square metre?
- Liquid screed installation costs 25 to 40 euros per square metre, including materials and labour. Material-only prices start at around 10-15 €/m². Total costs depend heavily on the screed thickness, the quantity required, site accessibility and any additional services such as grinding. Always obtain several quotes from specialist contractors.
- How thick should liquid screed be over underfloor heating?
- Liquid screed requires a minimum cover of 3.5 cm over the heating pipes of an underfloor heating system. Total screed thicknesses of 5 to 7 cm are common. This thickness ensures good heat storage and distribution while protecting the pipes from mechanical damage. The precise dimensions are determined by the heating system planner or screed contractor.
- What is the difference between liquid screed and dry screed?
- Liquid screed is a fluid, cement-based screed that is self-levelling and creates a perfectly even surface. Dry screed consists of prefabricated panels that are installed without water. Liquid screed takes a long time to dry and is ideal for underfloor heating and large areas. Dry screed can be walked on immediately, is lighter and is particularly suitable for renovation work.
You may also be interested in
- Laying screed yourself: A guide for your home
- Building a prefabricated house: Pros and cons at a glance
- Flooring for underfloor heating: The key facts
- Liquid vinyl or repair kit: How to repair vinyl flooring
- Sealing screed: Step-by-step guide and choice of materials
- Tiny house: Weighing up the pros and cons before building