
In brief: OSB boards are versatile wood panels for DIY projects. Choose the right grade for your application (OSB/3 for damp rooms and outdoor use). Let the boards acclimate for 48 hours before installation to help prevent warping. Leave an expansion gap of 10-15 mm and screw the boards down in a staggered pattern for maximum stability.
Contents
- What are OSB boards?
- What are the different OSB grades used for?
- How to install OSB boards: a step-by-step guide
- How do you cut and work with OSB boards?
- OSB DIY ideas for your home and garden
- Do OSB boards need to be sealed?
OSB boards are a popular choice for DIY projects. They are strong, affordable and give projects a modern, industrial look. Use them for a sturdy subfloor, stylish wall paneling or custom furniture. These oriented strand boards are remarkably versatile. To help you get started, here’s what you need to know about their properties, installation and creative uses.
What are OSB boards?
OSB stands for “Oriented Strand Board.” The name describes how these panels are made. Long, flat wood strands are arranged in three layers, with each layer oriented across the one below it. The strands are bonded with special resins under high pressure to form a strong panel. This cross-layer construction gives OSB boards their high bending strength and sets them apart from standard particleboard.
The visible wood strands give OSB boards their distinctive look. They are available with a sanded or unsanded surface. Sanded boards are smoother and better suited to visible applications that will later be painted or oiled. Many boards also have a practical tongue-and-groove edge, which makes it easier to install them seamlessly and securely over large areas such as floors.
What are the different OSB grades used for?
OSB boards come in different grades. Under the European standard DIN EN 300, they are divided into four use classes. Choosing the right grade is essential for your project's durability and safety.
The four OSB grades at a glance:
- OSB/1: Boards for interior use in dry conditions. They are suitable for general non-load-bearing applications, such as packaging or basic furniture.
- OSB/2: The standard grade for load-bearing applications in dry conditions. It is a common choice for floors, interior wall sheathing and shelving systems.
- OSB/3: Boards for load-bearing applications in damp conditions. Their moisture-resistant bonding makes them suitable for bathrooms, kitchens and building a garden + outdoor shed.
- OSB/4: Heavy-duty boards for load-bearing applications in damp conditions. Use this grade where structural loads are particularly high, such as in timber-frame construction or long-span ceilings.
Important note
For outdoor use or damp rooms, use only OSB/3 or OSB/4 boards. Standard OSB/2 boards swell when exposed to moisture and lose stability, which can cause serious structural damage. For outdoor use, always seal the surface and edges as well.
How to install OSB boards: a step-by-step guide
One of the most common uses for OSB boards is a sturdy subfloor. With the right preparation, installation is straightforward.
Step 1: Prepare the subfloor
The subfloor must be clean, dry and level. Remove old flooring and level any uneven areas with leveling compound. On mineral subfloors such as concrete or screed, first lay a PE film as a vapor barrier to protect the boards from rising moisture. Overlap the sheets by about 20 cm.
Step 2: Let the boards acclimate
Before installation, store the OSB boards flat in the room where you will install them for at least 48 hours. This gives them time to adjust to the temperature and humidity. It helps prevent the boards from warping, bowing or forming gaps after installation.
Acclimating the boards is essential for a long-lasting wood floor. Wood naturally expands and contracts. If you do not give it time to adjust to the room's conditions, you risk squeaks and unattractive warping.
Step 3: Install the boards
Start in one corner of the room. Use a saw to remove the tongue from the boards in the first row along the wall. Lay the boards with the cut edge against the wall and use wedges to maintain an expansion gap of 10-15 mm. This gap gives the wood room to expand and contract. Position the next board end to end with the first and join them using the tongue and groove. Cut the last piece in each row to size, then use the offcut to start the next row. This creates a staggered joint pattern with offsets of at least 40 cm for a stable floor. Screw each board to the substructure using suitable particleboard screws.
How do you work with OSB boards?
You can cut and install OSB boards with standard woodworking tools. The right techniques help you get clean, precise results.
Cutting
A handheld circular saw with a guide rail is best for straight cuts. You can also use a table saw or jigsaw. To minimize tear-out on the surface, cover the cut line with painter’s tape first and use a sharp, fine-toothed saw blade. Always cut from the visible side, as most tear-out happens where the saw blade exits the board.
Joining and fastening
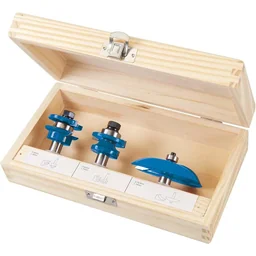
Screws are the most common way to fasten OSB boards. When screwing close to the edges, pre-drill the holes to prevent the board from splitting. For a particularly strong joint, such as in furniture making, you can also apply wood glue to the edges. Apply a thin layer of glue and press the parts firmly together until it dries. For professional joints and edge profiles, you can use a router bit set such as the
.
Pro tip
Measure twice, cut once. Mark measurements carefully on the board with a carpenter’s square and a sharp pencil. A handy multi-purpose tool such as the “Wunderschere”
works well for making paper templates for complex cutouts.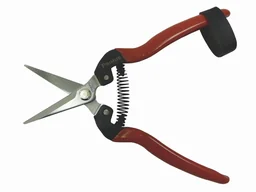
Sanding
If you want a smoother surface before applying a finish, sand the boards. For unsanded boards, start with 80-grit sandpaper and work your way up to 120-grit. Use an orbital sander for an even finish. After sanding, remove all dust with a vacuum cleaner and a slightly damp cloth.
Creative OSB DIY projects for your home and garden
OSB’s raw, natural look makes it an ideal material for creative, one-of-a-kind projects. Here’s some inspiration for your next build.
Indoor projects
OSB is perfect for building a complete workshop setup. From a sturdy workbench and custom shelving to a pegboard for your garden tools, OSB is strong and can stand up to the occasional scratch. A practical storage system for small parts, such as the
also helps keep everything organized. OSB can also add character to your living space: build a sturdy bed frame, a minimalist desk, or an entire accent wall.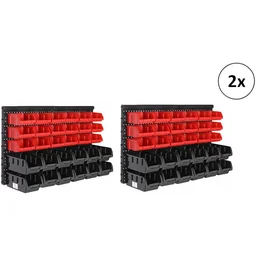
Extra tip
Add a personal touch to your OSB projects. Use stencils and spray paint to create graphic patterns or lettering. This breaks up the rustic look and gives your home unique design pieces.
Outdoor projects
With OSB/3 boards, you can quickly build a functional tool shed or a sturdy firewood rack. You can also make raised garden beds from OSB. Line the inside with a durable pond liner to prevent direct contact with the soil and help the wood last longer. You can even build durable outdoor furniture if you seal every surface and edge completely to keep out the weather.
Finishing OSB: Do OSB boards need to be sealed?
Whether to finish OSB boards depends on where you plan to use them and the look you want. Left unfinished, they have a charm of their own, but they’re more susceptible to dirt and moisture.
Painting and staining
For a durable surface that’s easy to clean, paint is your best choice. Apply a stain-blocking primer, then apply two to three coats of acrylic or synthetic resin paint. Wood stain is more transparent: it lightly tints the wood while leaving its distinctive strand pattern visible. It offers some protection, but isn’t as durable as paint.
The right finish not only protects the wood, it also defines the character of the furniture. A satin-matte finish looks modern and understated, while a quality oil brings out the texture and warmth of the wood.
Oiling and waxing
Wood oils and waxes penetrate deep into the board and protect it from within. The surface stays breathable, so the wood can continue to breathe. The result is a natural feel that’s pleasant to the touch. Oiled surfaces are ideal for living room furniture, but they need regular reapplication.
Leaving OSB unfinished
In dry rooms that don’t see heavy use, you can leave OSB boards unfinished. This is the most minimalist option and shows off their industrial character. Keep in mind, though, that stains and liquids will soak straight into the porous surface.
Frequently asked questions
- Can OSB boards be used outdoors?
- Yes, but only OSB/3 or OSB/4 boards. They’re made with moisture-resistant adhesive. Carefully seal or paint every surface and edge to protect them from rain, UV radiation, and other weather conditions over the long term.
- Should OSB boards be primed before painting?
- Yes, priming is strongly recommended. Use a stain-blocking or sealing primer to keep wood components such as resins from bleeding through the paint and causing unsightly stains. This helps create an even finish.
- What screws should you use for OSB boards?
- For OSB boards, use special wood screws with a partial or full thread. Their sharp threads grip the wood strands securely without causing the material to split too much. As a precaution, pre-drill holes for screws near the edges.
- How large should the expansion gap be for OSB boards?
- Leave an expansion gap of 10 to 15 millimeters between the boards and all fixed components, such as walls, door frames, and heating pipes. Wood expands and contracts as temperature and humidity change. The gap gives the boards room to move.
- Can you tile directly over OSB boards?
- Yes, but careful preparation is essential. The OSB subfloor must be completely stable, with no movement. Prime the boards and install a decoupling membrane to accommodate movement between the wood subfloor and the rigid tile surface. You should also use flexible tile adhesive.
You may also be interested in
- Creative DIY projects for your home and garden
- Upcycling ideas for your home and garden
- MDF boards: everything you need to know about this versatile wood-based material
- 5 DIY home improvement projects you can tackle yourself
- Epoxy resin DIY projects for your home and garden
- Plywood sheets: properties, types, and uses