
In brief: Painting over dark wall paint works best with thorough cleaning, light sanding to remove the sheen, and a suitable primer. Cover the floor and furniture, fill cracks, and apply an opaque bonding primer first. Then apply two thin coats of light-colored wall paint, allowing each to dry completely and rolling crosswise.
Painting over dark wall paint can transform a room instantly. Light colors make small rooms feel more spacious, bring more light into your home, and create a neutral backdrop for furniture and decor. For an even color change, the old coating needs careful preparation.
Check the surface first. Clean, repair, and prime the wall before reaching for the light paint. You can also find ideas for your future room design in the wall design category.
Why does dark wall paint need special preparation?
Dark colors contain a high concentration of pigments. Strong red, teal, violet, blue, or anthracite can therefore show through a light coating. Even if the wall looks opaque after the first coat, dark shadows or colored patches may become visible once it dries.
The surface also determines how well the new paint will adhere. Glossy latex paint, grease deposits, or dust prevent the new paint from bonding evenly. Cracks, wall-plug holes, and loose areas often show more clearly beneath a light coat than they did beneath the previous dark paint.
Which surfaces can cause problems when changing color?
Run your hand over the wall. If the surface feels chalky, leaves dust on your fingers, or the paint comes off when rubbed, it needs thorough treatment. Also press a piece of painter's tape firmly onto the surface and pull it off sharply.
- Matte, sound emulsion paint: This can usually be painted over directly if the wall is clean and dry.
- Glossy or washable paint: This needs light sanding followed by a suitable bonding primer.
- Chalky paint: Remove loose material and strengthen the surface with penetrating primer.
- Cracks and holes: Fill the areas, allow the filler to dry, and sand them smooth.
- Water or nicotine stains: Seal the discoloration with a suitable stain-blocking primer.
Which tools do you need?
For a clean result, you need more than paint and a roller. Lay out all the materials before you start. This helps you avoid interruptions while a painted area is still wet.
- Protective fleece and sturdy plastic sheeting for floors and furniture
- Painter's tape for baseboards, window frames, and switches
- Putty knife, filler, and sandpaper with a grit of about 120 to 180
- Bucket, stirring stick, and paint grid
- A short-nap roller for smooth walls and a suitable edging roller or flat brush
- Safety glasses, gloves, and a suitable mask for dusty sanding work
Pro tip
Test the paint system on an inconspicuous area measuring about 50 by 50 centimeters. Inspect the surface only after it has dried completely and in daylight. Paint usually looks more opaque and lighter when wet than it does when dry.
How do you prepare a dark wall for painting?
Clear the room as much as possible. Move heavy furniture to the center and cover it securely. Remove pictures, shelves, nails, and wall plugs so you can work on the entire surface without interruptions.
How do you clean the old coating?
First remove dust and cobwebs with a dry cloth or soft broom. Then wipe the wall with lukewarm water and a mild cleaning product. Kitchen walls, areas next to radiators, and walls in homes where people smoke often need more intensive cleaning.
- Remove dust, grease, and loose dirt.
- Wipe the wall with a well-wrung sponge.
- Remove cleaning-product residue with clean water.
- Let the surface dry completely before sanding or priming.
Avoid soaking the walls. Too much water can loosen wallpaper edges, cause drywall to swell, or unnecessarily extend the drying time. Ventilate the room, but do not create a strong draft directly across the wet wall.
How do you repair and sand the surface?
Open up fine cracks slightly with a putty knife so the filler can adhere properly. Fill cracks and wall-plug holes, smooth the surface, and observe the drying time specified by the manufacturer. Then sand the repaired areas flush.
You do not need to sand matte, sound emulsion paint completely. On glossy surfaces, light, even sanding with fine- to medium-grit sandpaper is usually sufficient. Remove all sanding dust thoroughly; otherwise, the primer will bond to a layer of dust rather than to the wall.
Important note
With very old, unknown, or heavily chalking coatings, avoid dry sanding until the coating has been professionally assessed. Wear protective equipment during dusty work and ensure good ventilation. Do not paint over loose, damp, or moldy areas.
The range includes
a concentrate for glue-based wall paint. It is suitable only for absorbent surfaces intended for this type of product and must be used according to the manufacturer's instructions. It does not replace bonding primer when painting over glossy, washable emulsion paint.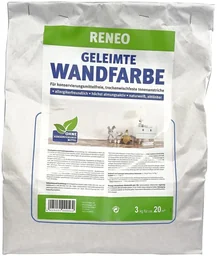
How do you choose the right primer and light-colored paint?
Primer does more than even out absorption. It can also improve adhesion, block stains, and reduce the intensity of a dark color. Choose a product based on the surface, not just the wall color you want to achieve.
Which primer is right for your wall?
- Opaque bonding primer: Suitable for firm, smooth, or slightly glossy surfaces. It creates a bright, paint-ready base.
- Pigmented primer: Useful when you need to neutralize a strong dark color quickly.
- Deep-penetrating primer: Suitable for highly absorbent or chalky surfaces. It strengthens the surface but does not reliably cover dark paint.
- Stain-blocking primer: Necessary for nicotine, water stains, soot, or other discoloration that can bleed through standard wall paint.
Stir the primer thoroughly and apply it evenly. Don't skimp on the edges and corners. Uneven primer can cause variations in sheen and visible overlaps later.
Which light-colored wall paint covers dark colors best?
Check the coverage rating and the manufacturer's specifications. A high-quality matte interior paint with excellent coverage makes changing the color easier. Very inexpensive paint with low pigment levels can look patchy even after several coats.
Pure white reflects a lot of light and creates a crisp look. Off-white, cream, or a light greige shade feels softer and is more forgiving of minor surface imperfections. Match the color to the floor, ceiling, doors, and existing furniture.
A dining set in a dark natural wood look, such as
pairs well with warm, light wall colors. A gray dining lounge with dark cushions, such as creates a calmer look against off-white or a light warm gray. These furnishings don't replace painting tools, but they can help you plan the room's finished look.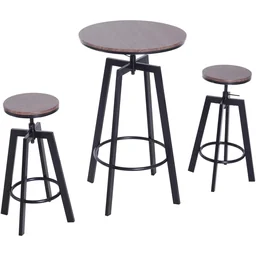

How do you calculate how much paint you need?
Measure each wall and multiply its length by its height. Subtract the area of large windows and doors, but allow for a little extra paint. Divide the total area by the coverage listed on the paint can, and plan on at least two coats when changing the color.
When possible, buy the amount you need from the same batch. Colors can vary slightly between batches. For large areas, mix several cans in a clean container before you start.
“Colors are deeds of light, deeds and sufferings.”
How do you paint a dark wall a lighter color?
Plan your painting for a dry day with a steady room temperature. Extreme cold slows drying, while intense heat causes paint to dry too quickly. Ventilate the room regularly, but avoid drafts across freshly painted surfaces.
What order should you work in?
- Cover the floor, furniture, and radiators.
- Carefully mask baseboards, window frames, outlets, and switches.
- Stir the paint slowly and thoroughly.
- Paint the corners, edges, and hard-to-reach areas first with a brush or edging roller.
- Roll the large surface in even, overlapping sections.
- Let the first coat dry completely.
- Apply the second coat, then carefully remove the painter's tape according to the manufacturer's instructions.
Start on the side of the room with the window and work away from the light. This makes it easier to see whether the sections are blending evenly. Keep a wet edge and mentally divide the wall into manageable sections.
How do you avoid roller marks?
For smooth interior walls, a short-nap roller with a nap of about 9 to 12 millimeters is usually suitable. A slightly longer nap may work better on lightly textured surfaces. Load the roller fully, remove excess paint on the paint grid, and work with even pressure.
First roll the paint on vertically, then spread it lightly in a crosswise direction without adding more paint. Finish the section with smooth strokes in the same direction. Don't squeeze the roller dry or go back over an area that has already started to dry.
The first coat may look uneven. Dark areas may still show through while the paint is wet. Don't keep touching up individual spots; wait until the paint has dried completely, then assess the entire wall.
DIY painting projects like these can be completed without professional equipment if you work evenly and follow the drying times. A high-quality roller, a clean paint grid, and good drop cloths make a bigger difference than having lots of specialty tools.
Additional advice
Don't apply the second coat only to visible shadows. Paint the entire wall in one continuous session. Sections painted at different times dry differently and may later show as shiny or matte patches.
What should you do if the dark color shows through?
After the final coat, wait until it has dried completely. Only then can you tell whether the dark color is actually showing through or whether the light paint is simply still damp and drying unevenly. Check the surface in daylight from several angles.
How should you treat areas where the color shows through?
If only a few areas remain darker, the surface may be more absorbent there, or the old paint may be unevenly thick. Do not sand wet paint. Once it has dried, smooth any loose edges, remove dust from the surface, and apply another even coat.
If the dark color keeps showing through despite several coats, you need a stain-blocking primer. This is especially important for nicotine, soot, water stains, or highly pigmented old paint. Allow the primer to dry, then paint over it with the light wall color.
How do you correct stripes and visible edges?
- Raised roller edges: Allow them to dry completely, smooth them carefully, remove dust, and apply a new coat.
- Light and dark stripes: Check whether the roller was loaded evenly. Apply the next coat wet-on-wet without long pauses.
- Brush marks: Apply a small amount of paint to the edges and immediately blend it into the rolled area.
- Paint edges along masking tape: Remove the tape slowly at an angle. Touch up small areas with a fine brush once the paint has dried.
- Splashes on floors or furniture: Carefully blot fresh paint without spreading it. Remove dried paint residue only with a method suitable for the material.
When can you decorate the wall?
A wall can feel dry while still not being fully cured. Wait until the stated curing time has passed before cleaning it with water, moving heavy furniture against it, or hanging larger pictures.
Wall art makes a subtle focal point on the finished surface. Wall stickers add personal accents, but should only be applied to a dry, clean, fully cured surface. Additional wall lights brighten the wall, but require suitable mounting and safe electrical installation.
“Architecture is the masterly, correct and magnificent play of masses brought together in light.”
Color change checklist
- The old wall paint is firmly bonded, and the surface is dry.
- Dust, grease, cracks, holes, and loose areas have been removed.
- Glossy or problematic areas have been sanded and primed appropriately.
- The light-colored paint has good coverage, and you have enough for at least two coats.
- You roll wet-on-wet, using light pressure and avoiding long interruptions.
- Each coat dries completely before you apply the next one.
- You wait until the curing time has passed before cleaning or decorating the finished wall.
This is how a dark wall becomes an even, light-colored surface. The key is not applying as many coats as possible, but starting with a sound surface, using the right primer, and applying the paint evenly and calmly.
Frequently asked questions
- Can I paint over a dark wall with a light color without primer?
- You can try if the old paint is matte, clean, firmly bonded, and even. For bold red, blue, or charcoal walls, a high-coverage bonding or stain-blocking primer significantly improves the result. It prevents the dark color from showing through, can save you from applying a third coat, and creates an even surface for the light topcoat.
- How many coats of light paint do I need over a dark wall?
- Plan on two thin coats as a general rule. The first coat often does not completely cover the dark surface. Let it dry according to the manufacturer's instructions, then check the wall in daylight. Strong pigments, an uneven surface, or low-opacity paint may make a third coat necessary.
- What primer should I use over a dark wall?
- For a matte, firmly bonded wall, a high-coverage bonding primer or pigmented primer is usually sufficient. Glossy, washable surfaces need a bonding primer after light sanding. For nicotine, water, or rust stains, use a suitable stain-blocking primer. Treat chalky or highly absorbent walls with a deep-penetrating primer.
- How can I prevent stripes when painting over a dark wall?
- Use a suitable roller, enough paint, and even pressure. Roll in overlapping strips, wet-on-wet, and work on one area without long pauses. Do not paint over areas that have already started to dry. Two thin, fully dried coats usually create a more even finish than one thick coat.
- When can I decorate a freshly painted light wall?
- Carefully remove the painter's tape after the final coat, before the paint has fully hardened. Apply wall art or wall stickers only when the surface is dry, clean, and durable enough to handle them. For drilling, cleaning, or heavy decorations, follow the curing time specified by the paint manufacturer.
You may also be interested in
- Painting Over Colored Walls: The Complete Guide
- Painting Over Latex Paint: How to Get the New Coat Right
- Wall Decor: Geometric Patterns with Dark Wall Paint
- Wall Paint: The Complete Guide to Choosing and Applying It
- Painting Walls: Top Tips for a Perfect Finish
- Choosing Wall Paint: Tips for the Perfect Renovation Paint Job