
In brief: Patio pedestals, also called paving slab supports, are plastic height levellers for patio slabs. They allow fast, level installation without a concrete foundation. The major benefit is the air gap created beneath the slabs, which provides dryness, ventilation and easy cable installation. They save time and effort when building a patio.
Patio Pedestals: Easy Installation and Key Benefits
Are you planning a new patio? The traditional approach using a gravel bed and grouting is time-consuming. Patio pedestals, also called paving slab supports, offer a modern alternative. You can lay patio slabs quickly and accurately without using large quantities of materials.
The system is simple. Plastic supports with adjustable heads carry the slabs. An air gap is created underneath. This construction solves many of the problems associated with traditional patios.
We show you the benefits, the correct installation method and what you need to consider. This will help you create your Garden + Outdoor project on a secure foundation.
What are patio pedestals?
Patio pedestals are point supports for patio slabs. They are usually made from UV-resistant plastic. A threaded rod in the centre allows the height to be adjusted.
The top has a support surface for the slab. The bottom has a foot for a secure stand. The supports perform two functions. They carry the load and compensate for uneven surfaces.
You place the supports directly on the prepared ground. The patio slabs then rest on top. The distance from the ground is typically 4 to 10 cm.
Pro tip
Buy patio pedestals with an integrated seal. They prevent cobwebs and small animals from getting into the cavity. This keeps the construction clean and well ventilated in the long term.
The different types of paving slab supports
Not every patio pedestal is suitable for every slab. Make sure you choose the right type for your material.
Universal supports have a simple, round support surface. They are suitable for most concrete and natural stone slabs. They provide good load distribution.
Point-contact supports have a small, cushioned tip. They are designed for ceramic slabs or thin natural stone. The contact point is minimal to prevent damage.
Angle supports hold the slabs in place at the sides. They are used at patio edges or on steps. They prevent the outer slabs from moving.
Choosing the right support is crucial for stability and durability. Compare the maximum load capacity of the models.
Why you should choose patio pedestals
The advantages over traditional installation are convincing. You save time and effort while creating better ventilation beneath your patio.
Fast and clean installation: You do not need to level and compact a heavy gravel bed. Place the supports, adjust the height and lay the slabs on top. The work creates almost no dust.
A perfect slope is guaranteed: Each support can be adjusted to the millimetre. You can set the required 2% slope for water drainage precisely. This is hardly possible with conventional methods.
Ventilated cavity: The air gap created underneath allows rainwater to dry quickly. Moisture does not build up. This protects the ground and helps prevent algae from forming on the underside of the slabs.
Flexible retrofitting: You can easily run cables for lighting or sockets beneath the patio. Installing heating pipes at a later date is also possible. Simply lift the slabs to do so.
Important note
The ground must be completely stable and frost-resistant. Patio pedestals will sink into soft garden soil. A layer of compacted hardcore or an existing concrete foundation is ideal. Check the structural stability of old surfaces.
The comparison: Traditional installation vs. patio pedestals
See the differences in a direct comparison.
Material requirements: Traditional patio construction requires a thick layer of frost protection, gravel and sand. With patio pedestals, almost all of this material is unnecessary. You save on delivery and disposal costs.
Working time: Installing slabs on gravel requires several days of levelling and compaction. With the support system, you can be finished in a weekend. The time saving is up to 70%.
Flexibility: A traditional patio is built to stay in place. With patio pedestals, you can extend, reduce or even move the patio. Damaged slabs can be replaced in seconds.
Patio pedestals are ideal for rented homes or temporary solutions. They leave no permanent impact on the ground.
How do you lay patio slabs on pedestals?
Installation follows a clear process. Good preparation is the key to success.
Step 1: Prepare the ground. The ground must be firm, level and free from vegetation. For concrete paving, cleaning is often enough. On hardcore, compact the surface thoroughly. A power tool such as a plate compactor can help.
Step 2: Plan the slope. The patio must slope gently away from the house. A 2% slope is standard. That means a 2 cm difference in height over a length of 1 m. Mark the lowest and highest points with a string line.
Step 3: Position the supports. Lay the patio slabs out temporarily. Place a patio pedestal at each corner of every slab. Large slabs also need supports in the centre. Spacing should not exceed 50 cm.
Step 4: Adjust the height. Turn the threaded rod on each support. Use a spirit level and your taut string line as a reference. Check the slope repeatedly.
Step 5: Lay the slabs. Carefully place the patio slabs on the adjusted supports. Tap them gently into place with a rubber mallet. Check the joint widths. With this system, they are usually slightly wider.
“Precisely adjusting the first row of supports is crucial. It serves as the reference for the entire area. Take twice as much time over this step. Every millimetre of error is magnified across the length of the patio.”
What tools do you need?
The tool list is short. You probably already own most of the equipment.
- Spirit level: At least 1 m long for accurate measurements.
- Rubber mallet: For gently tapping the slabs into place.
- Cutting machine: For cutting edge slabs to size. Use a wet saw for stone or a powerful angle grinder with a diamond blade.
- Hammer drill: Only needed if you want to fix the supports to a concrete slab. Wall plugs and screws are often included.
- Hand tools: Tape measure, string, pencil, safety glasses and gloves.
As you can see, the effort involved is minimal. You only need heavy machinery such as a plate compactor to prepare the ground.
Additional advice
Do not use a pipe wrench to adjust the height of the supports. It can damage the plastic thread. Use the supplied adjustment tool or a simple ratchet with a socket of the right size. This is faster and gentler.
The Right Patio for Pedestals: Materials and Planning
Not every slab or layout is equally suitable. Keep these points in mind when planning.
Slab material: Frost-resistant concrete slabs are the first choice. They are heavy, stable and cost-effective. Natural stone such as granite or basalt also works extremely well. Make sure they are at least 4 cm thick. Thinner slabs can break when supported at individual points.
Slab size: Large formats from 60x60 cm reduce the number of pedestals required. They look modern and create calm, uncluttered surfaces. However, large slabs need more pedestals in the centre for support. Calculate the structural requirements carefully.
Patio on a slope: This is where patio pedestals really shine. They easily compensate for differences in height. On steep slopes, you need pedestals with particularly long threaded rods. Measure the height difference carefully before buying.
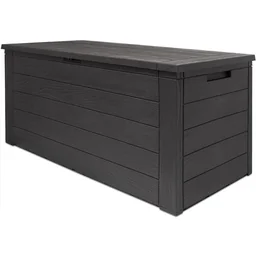
Consider the surroundings. A
protects your patio heater in bad weather. A
Care and Maintenance of a Pedestal Patio
Maintenance is simple but important for a long service life.
Regular checks: Check once a year that all slabs are firmly supported. Temperature fluctuations can slightly alter the adjustment. Readjust the settings if a slab wobbles.
Cleaning the cavity: Leaves or soil can fall into the gap. Clean the edges with a leaf blower or brush. Prevent the cavity from becoming completely blocked. Ventilation is the key principle.
Keep the joints clear: The joints between the slabs remain open or are filled with permeable grit. Remove emerging weeds at an early stage. This keeps the system intact.
With proper care, the plastic pedestals will last for decades. They are UV-stabilised and withstand frosty winters.
“The biggest mistake is neglecting the sub-base. Patio pedestals are not a substitute for a stable foundation. They are the connection between the foundation and the surface covering. Invest 80% of your time in preparing the ground, and the rest will take care of itself.”
Patio Pedestals in Use: Three Practical Examples
See how versatile the system can be.
Example 1: Rooftop patio on a garage. Weight is critical here. Patio pedestals with lightweight slabs made from wood composite or thin natural stone reduce the load. The ventilation protects the roof waterproofing from trapped moisture.
Example 2: Step-free access. You need a completely level surface without trip edges. Patio pedestals allow you to level every millimetre. The transition from the patio into the house becomes seamless. The joints can be kept narrow.
Example 3: Temporary event area. For a garden party or summer market, you can build a solid walkway. After the season, simply remove the slabs. Store the pedestals compactly. The ground remains undamaged.
For cosy evenings on your new patio, a
is the perfect choice. The extendable table offers flexibility for small and large gatherings.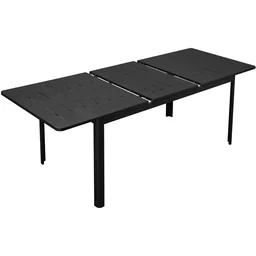
Calculating the Cost of Your Project
How much does a patio with pedestals cost? The calculation consists of three parts.
1. Patio pedestals: Plan for 4-6 pedestals per square metre. At a unit price of 0,80 to 1,50 euros, the material cost for the pedestals comes to around 4-8 euros/m².
2. Patio slabs: This is the biggest cost factor. Basic concrete slabs start at 20 euros/m². High-quality natural stone costs 80 euros/m² or more. Allow for 10% wastage for cuts.
3. Sub-base & accessories: Gravel for a frost-protection layer, possibly a patio groundsheet as a weed membrane, and edge restraints. Allow 5-15 euros/m² for this.
A rough estimate: For a 20 m² patio with medium-priced slabs, total costs come to between 800 and 2500 euros, depending on the surface covering selected.
Conclusion: Modern Patio Construction with a System
Patio pedestals are revolutionising patio construction. They make installation faster, more precise and more flexible. The ventilated cavity is a technical advantage that solves moisture-related problems.
The method is equally suitable for DIY enthusiasts and professionals. With a little DIY skill and careful planning, you can build a durable, attractive patio. You also avoid strenuous physical work.
Start by checking your sub-base. Then choose suitable pedestals and high-quality slabs. Remember useful garden equipment and accessories for the finished area. Your new outdoor living space is waiting.
Patio pedestals are not a passing trend but a well-designed construction system. They offer solutions for today’s requirements in terms of use, flexibility and installation speed. Give them a try.
Frequently Asked Questions
- What are patio pedestals and what do I need them for?
- Patio pedestals are plastic supports that patio slabs are placed on. They replace a traditional bed of gravel or sand. The pedestals raise the slabs, create a ventilated cavity and compensate for height differences in the substrate to millimetre accuracy. This significantly speeds up installation.
- Can I use patio pedestals on any surface?
- Yes, patio pedestals are suitable for solid, load-bearing surfaces such as concrete, screed or compacted gravel. They are unsuitable for soft garden soil or sand. The substrate must be level and permeable to water to prevent standing water beneath the slabs. Check its load-bearing capacity beforehand.
- How do I lay patio slabs with pedestals?
- First, establish a 2% slope away from the house. Position the patio pedestals on the substrate at the grid spacing required for your slabs. Adjust the height of each pedestal using the threaded rod. Place the slabs directly on the pedestals. Check everything with a spirit level. The process requires few tools and is clean.
- Which patio slabs are suitable for pedestals?
- You can use all common frost-resistant materials: concrete slabs, natural stone slabs such as granite or basalt, and ceramic slabs. Thickness is the key factor. Slabs should be at least 4 cm thick; for large formats, 5-6 cm is preferable. Thinner slabs may break or sag.
- How much does a patio with pedestals cost?
- The pedestals themselves cost around 3-8 euros per square meter, depending on the number required. The total cost is determined primarily by the slabs you choose. Allow for the cost of preparing the substrate. Compared with traditional installation, you save materials such as gravel and a considerable amount of time, which helps put the cost into perspective.
You may also be interested in
- Build a raised patio: DIY guide for your wooden deck
- Wooden patio substructure: Build it stable and easily
- Paving a stone patio: Step-by-step guide for DIYers
- Plant island in your patio: How to add green accents
- How to lay patio decking boards correctly: The perfect gap width
- Laying patio tiles: Your route to a dream patio