
In brief: Plan your dream bathroom in 5 clear phases: 1. Assess your needs and space. 2. Gather specific design ideas. 3. Create professional plans with a floor plan and electrical layout. 4. Choose materials and products for sanitaryware and surfaces. 5. Bring it to life with reliable tradespeople. A well-thought-out plan is the foundation for a bathroom that works well and looks great for years.
Plan Your Bathroom: From Idea to Dream Bathroom in 5 Steps
Planning a new bathroom is a project with a major impact. It improves your daily routine and the value of your property. This guide breaks the process down into five practical steps. This helps you avoid common pitfalls and systematically work towards your personal dream bathroom.
The steps range from the initial assessment to final installation. Each phase builds on the one before it. A solid foundation in the planning stage saves time, stress and money later on.
Step 1: Assess What You Have – and What You Need
Before you start collecting images, take a close look at the space. Measure your bathroom to the nearest millimetre. Note the position of all existing services: waste pipes, fresh water inlets, electrical connections and ventilation ducts.
These details are non-negotiable. They determine which changes are feasible and which involve considerable work. Moving a shower waste one metre can mean lifting the flooring across the entire floor.
At the same time, ask yourself: Who will use the bathroom? Do you need a bath, or is a large shower enough? How much storage is needed for towels, toiletries and cleaning products? A bathroom for a family has different requirements from a guest bathroom.
You gain the greatest planning certainty when you understand the current state of your installations. Looking into the floor or ceiling construction of the storey below often reveals the direction in which the pipes run.
Ask Yourself the Right Questions
List your daily routines. Do two of you use the washbasin at the same time in the morning? Then you need a double washbasin or plenty of counter space. Do you often use the toilet for reading? Separate reading light would then be useful.
Think about the future, too. Are you planning for accessible living? If so, leave space now for a wheelchair-accessible washbasin and grab rails. The design should meet your needs for the next 10 to 15 years.
Important note
Only change the position of the toilet after consulting a professional. The waste connection requires a specific gradient. Major relocations may only be possible with a macerator pump, which creates noise and requires regular maintenance.
Step 2: Find Inspiration and Define Your Style
Now the creative phase begins. Collect images that appeal to you. Look beyond the colour and focus on details such as the tile layout, the type of lighting and the handles on the cabinets.
Pinterest, magazines and specialist showrooms are good sources of inspiration. Create a specific mood board. You will soon see whether your preferences lean towards an urban-industrial, Scandinavian-natural or classic marble-led style.
Your style has a fundamental influence on your choice of materials. An industrial look with exposed concrete and metal calls for different surfaces from a country-style bathroom with a wood effect and floral motifs. For practical ideas, you can also find suitable bathroom furnishings in our shop.
Function Before Form: The Bathroom as a Workspace
Do not forget that a bathroom is a wet room. Every material must be resistant to moisture. Beauty that develops mould or swells is not worth having.
Develop a colour and materials scheme. Limit yourself to two, or three at most, dominant materials. Too many different surfaces can look busy. Using the same type of tile on the walls and floor creates a sense of calm and space.
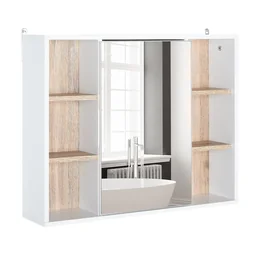
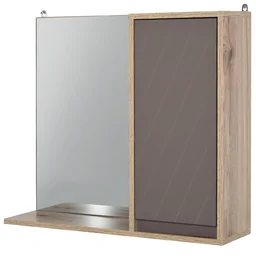
Products such as the or the combine storage and a mirror in one unit. They save space and create a tidy appearance.
Step 3: Draw the Floor Plan and Plan the Technical Details
Now the idea becomes a building plan. Draw your room to a scale of 1:20 or 1:25. Cut out accurately scaled cardboard models of your desired fixtures: toilet, shower, washbasin, bath and cabinet.
Move these models around on your plan. Pay attention to minimum clearances. There should be at least 60 cm of clear floor space in front of the toilet and washbasin. The door should not open against a bathroom fixture.
The best layout often follows the classic trio: washbasin area, toilet and wet zone (shower/bath). You can also separate these zones visually with different floor coverings or wall colours.
Pro tip
When moving fixtures around, use the “hose length” as a guide. Imagine having to reach every corner of the shower with a flexible shower hose. This prevents narrow, unusable recesses.
The Invisible Layer: Planning Electrical Systems and Lighting
Electrical planning is critical. You need RCD-protected sockets (residual current device) for a hairdryer and electric shaver. Plan a separate circuit for a powerful instantaneous water heater or boiler.
Lighting consists of general lighting, mirror lighting and accent lighting. Position the mirror light to the side at eye level, not above it. This avoids distracting shadows on your face. Dimmers create atmospheric moods.
Think about ventilation. A damp bathroom needs a powerful extractor fan, ideally with a humidity sensor. Air must be able to enter as well as leave, so plan an air inlet under the door or through dedicated ventilation grilles.
The greatest increase in value comes not from the most expensive washbasin, but from professionally planned lighting. Light showcases the materials and makes the bathroom feel welcoming and functional. Every user notices this immediately.
Step 4: Choose Materials and Products
This is where the character and budget of your bathroom take shape. Start with the main sanitary fixtures: bath, shower, washbasin and toilet. Decide between a floor-standing and wall-hung toilet. Wall-hung models are easier to clean and create a lighter look, but they require a false wall for installation.
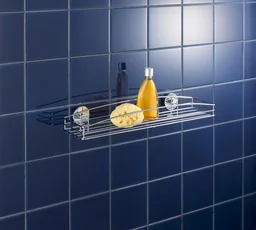
For washbasins, choose between countertop, undermount and wall-mounted models. Undermount washbasins with a vanity unit provide concealed storage. Practical additions include shelves such as the , which also adhere securely to smooth surfaces.
For the shower, decide on the right option: a level-access shower, shower tray or shower area? Level-access solutions are modern and accessible, but require extensive waterproofing. You can find suitable materials for all wet-room work in the Plumbing + Irrigation category.
Surfaces: Tiles, Natural Stone & Alternatives
Tiles are the classic choice. Large-format tiles from 60x60 cm minimise grout lines and create a calmer look. Pay attention to slip resistance (rating R9 for floors, R10 for shower floors).
Natural stone such as marble or slate is elegant, but requires a lot of care and must be sealed. Alternatives include porcelain stoneware, waterproof vinyl flooring and concrete-effect surfaces. For a natural look throughout your home, it is worth exploring Garden + Outdoor, where materials often complement one another.
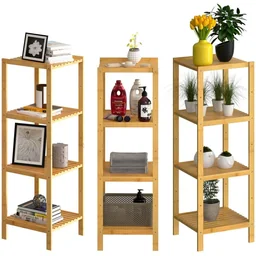
Furniture such as this add warmth and sustainability to your bathroom. For all wooden furniture, make sure it has a high-quality, water-repellent finish.
Additional advice
Request samples of all materials. Look at the colour of the tiles or washbasin in daylight and under artificial lighting in your bathroom. A shade of grey can look completely different under an energy-saving bulb than it does in the showroom.
Step 5: Putting the Plan into Practice – Coordinating and Managing Tradespeople
Once your plans are complete and your products selected, you can begin the work. Ask three specialist contractors for detailed quotes. Compare not only the price, but also the scope of work and estimated construction time.
A good schedule coordinates the different trades: first the builder for wall openings, then the plumber for the false-wall installation and pipework, followed by the tiler, then the plumber again for final installation, and finally the decorator and electrician.
Hold regular meetings with your project manager. Resolve any outstanding questions immediately. Changes during the construction phase (“Should the washbasin be 10 cm further to the left after all?”) are the biggest driver of additional costs.
The Final Stage: Handover and Care Instructions
During the handover, test everything: every tap on hot and cold, every drain flow rate, every socket, every light switch and the ventilation. Check that the grout lines are complete and that the surfaces are free from damage.
Have all warranty documents and care instructions for the materials used handed over to you. Special care products for natural stone or the correct way to clean your fittings will extend their service life and keep them looking beautiful.
Plan for future use too. A well-planned bathroom can adapt as the needs of its occupants change. With the right foundations, you can easily add accessories later, such as new towel rails or a different shower head. You can also find inspiration for accessories and more in our Baby Room Ideas section, where similar requirements for practicality and space optimisation often apply.
Your dream bathroom will not appear overnight; it takes shape step by step. With this structured approach, you can stay organised, set the right priorities and enjoy a bathroom that suits you perfectly in terms of function, style and atmosphere.
Frequently Asked Questions
- How much time should I allow for planning a new bathroom?
- Allow 4 to 8 weeks for the planning stage alone, including gathering ideas, creating a design and obtaining quotes. The construction phase takes 2 to 6 weeks, depending on the scope of the work. Planning early avoids time pressure and allows you to make careful decisions about materials and tradespeople.
- Which mistakes should you avoid when planning a bathroom?
- Avoid insufficient storage. Plan more shelving and storage space than you initially think you need. Do not overlook ventilation. A powerful extractor fan is essential. Use waterproof materials outside the immediate splash zone too. Do not forget the lighting, especially around the mirror.
- Can I plan my bathroom myself without an architect?
- Yes, for standard layouts and clear ideas, you can plan the bathroom yourself. Use planning software or draw scale sketches. However, seek professional advice from plumbers at an early stage regarding water supply and drainage, as well as structural considerations, especially when relocating sanitary fixtures.
- How much does it cost to renovate an average bathroom?
- Costs vary considerably. For a complete bathroom with new sanitary fixtures, tiles and electrics, expect to pay 15.000 to 30.000 Euro. A simple refit, where the pipework and layout remain unchanged, is cheaper. Always obtain several detailed quotes.
- How can I integrate smart technology into my bathroom without overcomplicating the design?
- Start with the basics: plan enough sockets with RCD protection and install conduits for future upgrades. Smart mirrors with integrated lighting or waterproof speakers are good starting points. Thermostatic fittings with preset temperature controls increase comfort with relatively little effort.
You might also be interested in
- Designing a modern bathroom: How do I plan my dream bathroom?
- Planning a bathroom remodel: The ultimate checklist for your project
- Planning a bathroom renovation: Ideas, costs and practical tips
- Building your own bathroom: Your route to a dream bathroom
- Planning a kitchen: From the idea to your dream kitchen
- Bathroom renovation costs: Plan and save when modernising