
Kurz erklärt: Die goldene Regel beim Holzstreichen lautet: Arbeiten Sie immer in Richtung der Holzmaserung. Ob Sie grundieren, lackieren oder lasieren – jeder einzelne Pinselstrich folgt dem natürlichen Faserverlauf des Holzes. Dadurch verteilt sich der Anstrichstoff gleichmäßig, dringt optimal ein und trocknet ohne unschöne Streifen oder sichtbare Übergänge. Diese Methode gilt für Bretter, Möbel und auch für die Nachbehandlung von Abdeckplanen für Holz im Außenbereich.
Die Grundregel für perfekte Holzoberflächen
Jedes Holzprojekt beginnt mit einer einfachen, nicht verhandelbaren Regel: Arbeiten Sie mit der Maserung. Diese natürliche Faserrichtung bestimmt, wie das Holz atmet, sich verzieht und wie es Anstrichstoffe aufnimmt. Ignorieren Sie diese Richtung, werden Pinselstriche sichtbar, die Oberfläche wirkt unruhig und der Schutz leidet.
Stellen Sie sich die Holzfasern wie ein Bündel Strohhalme vor. Streichen Sie entlang der Halme, gleitet der Pinsel sauber. Streichen Sie quer darüber, stellen sich die Fasern auf und behindern einen gleichmäßigen Film. Dieser Effekt zeigt sich bei allen Anstrichen, ist aber bei durchscheinenden Lasuren besonders fatal.
Profi-Tipp
Licht setzt auf. Bevor Sie den ersten Pinselstrich setzen, stellen Sie Ihre Arbeitsleuchte seitlich zur Holzfläche auf. So sehen Sie sofort, ob Sie mit oder gegen die Maserung arbeiten – jeder falsche Strich wirft einen Schatten.
Vorbereitung: Die halbe Miete
Die Oberfläche richtig behandeln
Ein perfekter Anstrich scheitert nie an der Lackierung selbst, sondern an der Vorbereitung. Schleifen ist der wichtigste Schritt. Beginnen Sie mit einer groben Körnung (z.B. 80), um alte Lacke zu entfernen oder grobe Macken auszugleichen. Arbeiten Sie dabei stets in Richtung der Maserung.
Wechseln Sie dann zu feineren Körnungen (120, dann 180). Jeder Schleifgang entfernt die Kratzspuren der vorherigen Körnung. Nach dem Schleifen saugen Sie das Holz gründlich ab und wischen es mit einem fusselfreien, leicht feuchten Lappen ab. So entfernen Sie den letzten Schleifstaub.
Die Zeit, die man in die Vorbereitung der Oberfläche investiert, sieht man dem Endergebnis nicht an – man sieht nur, wenn man sie gespart hat.
Die richtigen Werkzeuge wählen
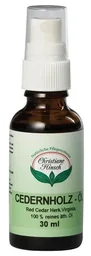
Ihr Pinsel muss zum Produkt passen. Für dünnflüssige Lasuren und Holzöle wie eignen sich weiche, synthetische Pinsel. Sie verteilen das Material schonend. Für zähflüssige Dickschichtlasuren (, ) nehmen Sie einen hochwertigen Kurzgriffpinsel mit dickem, dichtem Borstenkopf. Er trägt mehr Farbe auf und verhindert zu häufiges Nachtauchen.
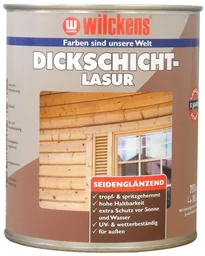
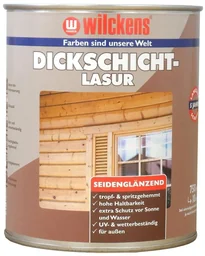
Für große, ebene Flächen wie Gartenzäune können Sie eine Rolle zur Vorverteilung nutzen. Das finale Verstreifen und Glätten übernimmt aber immer der Pinsel – in Maserungsrichtung.
Wichtiger Hinweis
Vermeiden Sie unbedingt das Arbeiten in praller Sonne oder bei großer Hitze. Der Anstrichstoff trocknet dann zu schnell an der Oberfläche, wird klebrig und hinterlässt sichtbare Pinselansätze. Arbeiten Sie im Schatten oder in den kühleren Morgenstunden.
Der Anstrich in der Praxis: Schritt für Schritt
So tragen Sie Lasuren und Lacke richtig auf
Beginnen Sie an einer unauffälligen Stelle oder Kante. Tauchen Sie den Pinsel etwa zu einem Drittel seiner Borstenlänge in den Anstrichstoff. Streichen Sie den Überschuss am Rand des Gefäßes ab, nicht an der Kante. So vermeiden Sie Tropfen und Laufspuren.
Setzen Sie den Pinsel mit leichtem Druck auf und ziehen Sie ihn in einem langen, gleichmäßigen Strich entlang der Maserung durch. Arbeiten Sie von der trockenen in die nasse Fläche hinein, um keine sichtbaren Stöße oder Überlappungen zu erzeugen. Bei breiten Flächen arbeiten Sie in Bahnen, die sich leicht überlappen.
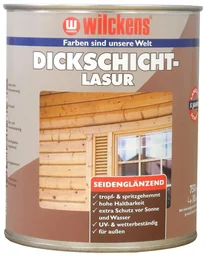
Besonders bei Lasur-Produkten wie unserer ist Geduld gefragt. Ziehen Sie die erste Schicht komplett ein, bevor Sie eine zweite auftragen. Das kann je nach Holzart und Witterung mehrere Stunden dauern.
Ein guter Pinselstrich ist nicht schnell, sondern gleichmäßig. Nehmen Sie sich Zeit für jede Bahn. Eile führt zu Nacharbeiten, die mehr Zeit kosten als das geduldige Arbeiten von Beginn an.
Spezialfälle: Kanten, Profile und Gartenholz
Bei Brettern mit Nut und Feder streichen Sie zuerst die Federn, dann die flachen Mittelflächen und zuletzt die Nuten. Nutzen Sie für schmale Profile einen Flachpinsel, dessen Breite der Profilbreite entspricht.
Für massives Gartenholz, das später vielleicht mit einer Abdeckplane für Holz geschützt wird, ist die letzte Anstrichschicht besonders wichtig. Sie muss vollständig durchgetrocknet sein, bevor das Holz abgedeckt wird, um Schimmelbildung zu verhindern.
Zusätzlicher Rat
Mischen Sie Anstrichstoffe aus großen Gebinden vor dem Gebrauch immer gründlich durch. Pigmente setzen sich ab. Ein durchgängig gemischter Farbton ist die Voraussetzung für ein einheitliches Ergebnis auf allen Flächen.
Typische Fehler und wie Sie sie vermeiden
Sichtbare Pinselstriche und ungleiche Farbtöne
Dieser Fehler entsteht fast immer durch falsche Streichrichtung oder zu wenig Anstrichstoff auf dem Pinsel. Ein halbleerer, trockener Pinsel muss mit mehr Druck geführt werden und hinterlässt Streifen. Halten Sie den Pinsel stets ausreichend gefüllt.
Ungleiche Farbtöne auf einer Fläche deuten darauf hin, dass Sie nicht „nass-in-nass“ gearbeitet haben. Ein Teil ist bereits angetrocknet, bevor Sie die angrenzende Bahn gestrichen haben. Arbeiten Sie mit einem Partner bei großen Flächen oder teilen Sie die Fläche in logische Abschnitte.
Blasenbildung und Laufspuren
Blasen entstehen, wenn Sie zu stark mit dem Pinsel „schäumend“ arbeiten oder das Holz noch feucht war. Laufspuren sind ein Zeichen für zu viel flüssiges Material auf einmal. Streichen Sie Überschüsse immer rechtzeitig und mit der Maserung aus.
Für filigrane Arbeiten wie das Streichen von Holzbuchstaben fürs Kinderzimmer gilt: Weniger ist mehr. Tragen Sie dünne Schichten auf und lassen Sie jede Schicht vollständig trocknen.
Pflege und Nachbehandlung gestrichener Holzflächen
Ein perfekter Anstrich hält länger, wenn Sie ihn pflegen. Bei Möbeln reicht regelmäßiges Abstauben. Bei stark beanspruchten Flächen wie Tischplatten verwenden Sie schonende Reiniger ohne Lösungsmittel.
Für Außenflächen, die mit Dickschichtlasur () behandelt wurden, kontrollieren Sie einmal jährlich den Zustand. Bei Abrieb oder beginnender Vergrauung schleifen Sie die betroffene Stelle leicht an und tragen eine neue Schicht Lasur auf – natürlich in Maserungsrichtung.
Lagern Sie Reste von Anstrichstoffen wie kühl, frostfrei und dunkel. Verschließen Sie die Dosen luftdicht, indem Sie den Deckel festklopfen und die Dose auf den Kopf stellen. So bildet der Inhalt einen eigenen Verschluss.
Für alle weiteren Projekte rund um Haus und Garten finden Sie Material und Inspiration in unserem Garten + Outdoor-Sortiment. Von der Bewässerung bis zur Gartenarbeit ist alles dabei.
Häufige Fragen
- Warum muss man beim Holzstreichen in Richtung der Maserung arbeiten?
- Holz besteht aus langen Fasern, die Feuchtigkeit aufnehmen und abgeben. Streichen Sie mit der Maserung, dringt der Anstrichstoff wie Lack oder Lasur tief und gleichmäßig in diese Fasern ein. Gegen die Maserung arbeiten bedeutet, die Fasern hochzustellen und den Auftrag uneben zu machen. Das Ergebnis wären raue Stellen, ungleichmäßige Farbverteilung und sichtbare Pinselmarkierungen auf der fertigen Oberfläche.
- Gilt die Regel mit der Maserung auch für dickflüssige Dickschichtlasuren?
- Ja, absolut. Gerade bei deckenden Produkten wie Dickschichtlasuren ist die gleichmäßige Verteilung entscheidend. Arbeiten Sie mit der Maserung, verteilen Sie die zähere Konsistenz optimal und vermeiden Laufspuren oder Tropfen. Produkte wie unsere PRODUCT_141552, PRODUCT_134465 oder PRODUCT_131594 erfordern wegen ihrer hohen Pigmentierung und Schichtdicke besondere Sorgfalt in der Applikation.
- Wie streiche ich Holzmöbel mit vielen Kanten und Ecken richtig?
- Teilen Sie das Möbelstück gedanklich in Flächen auf. Streichen Sie zuerst alle vertikalen Flächen (z.B. Seitenwände) von oben nach unten mit der Maserung. Dann folgen die horizontalen Flächen (z.B. Tischplatte) in ihrem spezifischen Maserungsverlauf. Bei verwinkelten Stellen wie Zargen oder Holzspielzeug verwenden Sie einen kleineren Pinsel, behalten aber die Richtung der jeweiligen kleinen Fläche bei.
- Kann ich mit einer Rolle gegen die Maserung streichen, um schneller fertig zu werden?
- Nein. Auch mit einer Rolle – ob Farbroller oder Schaumstoffrolle – arbeiten Sie immer entlang der Maserung. Das finale „Abziehen“ oder Verteilen erfolgt dann stets mit einem Pinsel, ebenfalls in Maserungsrichtung. Dies glättet die von der Rolle hinterlassenen Luftblasen und Unebenheiten. Schnelligkeit opfert hier die Qualität. Für große, glatte Flächen im Gartenbereich finden Sie passende Werkzeuge in unserer Kategorie Gartenwerkzeuge.
- Muss ich bei geöltem Holz auch die Maserungsrichtung beachten?
- Ja, die Grundregel bleibt. Ob Öl, Lasur oder Lack: Das Mittel muss in die Holzfasern eindringen. Tragen Sie Holzöl wie unser PRODUCT_104634 mit einem Lappen oder Pinsel immer in Richtung der Maserung auf. So verhindern Sie, dass sich Ölnester bilden oder die Oberfläche fleckig wird. Überschüssiges Öl wischen Sie nach der Einwirkzeit ebenfalls mit der Maserung ab.
Das könnte Sie auch interessieren
- Rauhfaser richtig streichen
- Saubere Kanten beim Wandstreichen: So gelingen perfekte Übergänge
- Wände streichen: Die besten Tipps für ein perfektes Ergebnis
- Kreative Streich-Ideen: Neue Farben für Ihr Zuhause
- Laminat richtig verlegen: Welche Richtung ist die beste?
- Richtig schleifen: Techniken und Werkzeuge für DIY-Projekte