
In brief: Proper care of water pump pliers includes regularly removing dirt and moisture after every use. Lubricate the joint with penetrating oil or gun oil to keep it moving freely. Protect the metal surfaces with a thin film of oil to effectively prevent rust.
A good pair of water pump pliers is an indispensable helper in the workshop, home and garden. It grips pipes, nuts and stubborn workpieces with impressive force. But like any valuable hand tool, it needs care to maintain its performance and service life. Neglect can lead to rust, stiff joints and blunt teeth. With just a few simple steps, you can keep your pliers performing at their best for many years.
Proper maintenance turns a simple tool into a reliable partner for countless projects. It protects the value of your investment and ensures that your pliers work perfectly when you need them most.
The foundation of long-lasting performance: High-quality pliers
Every care routine starts with a good foundation. Pliers made from inferior steel will soon reach their limits, even with the best maintenance. High-quality chrome vanadium steel (Cr-V) provides the hardness and toughness needed to withstand heavy loads. It is more resistant to deformation and corrosion.
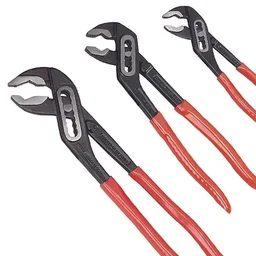
An excellent starting point for any workshop is the 3-Piece Cr-V Water Pump Pliers Set. This set offers three common sizes, providing the flexibility to handle a wide range of tasks, from delicate work under the sink to applying serious force to heating pipes. Investing in a set like this is worthwhile because caring for these quality tools will keep them working for decades.
How do I clean my water pump pliers properly?
Cleaning is the first and most important step in tool maintenance. Dirt, swarf and moisture are the main enemies of any pair of pliers. It is best to clean them immediately after completing your work.
Step 1: Remove loose dirt
First remove loose dirt, sand and metal shavings. A stiff brush, an old paintbrush or compressed air are ideal for this. Pay particular attention to the joint and the teeth of the gripping surfaces, as dirt can become particularly stubborn here and impair the tool's function.
Step 2: Remove stubborn grime
Grease, oil and dried-on dirt require more intensive cleaning. A cloth soaked in brake cleaner or a cold degreaser works wonders here. Alternatively, you can wash the pliers with warm water and a mild soapy solution. Use an old toothbrush to reach the grooves and the joint.
A tool is an extension of the hand. Only if you look after it will it serve you faithfully and enable precise work.
Step 3: The crucial step – dry thoroughly
This step is crucial in the fight against rust. After every wet cleaning, you must dry the pliers completely. Carefully wipe them with a clean, dry cloth. Do not forget the gaps in the joint. Then leave the pliers to air-dry for a while before oiling or storing them.
How do I protect my tools from rust effectively?
Rust is the silent destroyer of steel tools. A thin, invisible layer of iron oxide can ruin the precise fit of a joint and weaken the gripping teeth. Effective rust protection is therefore essential.
Proper oiling as a protective shield
A thin film of oil is the best protection against moisture. Once the pliers are clean and dry, apply a few drops of a suitable oil. Put one drop directly into the joint and move the pliers several times so that the oil spreads. Then wipe the entire metal surface of the pliers with a lightly oiled cloth. Less is more here; an ultra-thin film is sufficient.
Pro tip
An old toothbrush or pipe cleaner is an excellent aid for removing dirt from the adjustable joint and gripping teeth. This ensures that no particles block the mechanism or compromise the rust protection.
Which oil is right?
Not all oils are the same. Cooking oil and other organic oils become sticky and can make the tool unusable. Use specialist oils for tools.
- Penetrating oils (e.g. WD-40): Ideal for cleaning and displacing moisture. They are useful for freeing seized joints. However, their protective film does not last very long.
- Gun oils (e.g. Ballistol): An excellent choice. They clean, lubricate and preserve without becoming sticky. They provide good, long-lasting corrosion protection.
- Light machine oils (sewing machine oil): Pure lubricating and protective oils. They are resin-free and acid-free and form a stable protective film, making them ideal for long-term storage.
What to do if rust has already formed?
Don’t panic if you spot the first signs of rust. Depending on how extensive it is, you can deal with the problem using simple methods or more powerful tools.
For light surface rust
Surface rust can often be removed easily. Soak a cloth in penetrating oil and rub the affected areas vigorously. For more stubborn spots, use fine steel wool (grade 00 or 000) or a brass brush. Brass is softer than steel and is less likely to scratch the pliers.
For heavier rust
Deeper rust requires more effort. You can use a wire brush here, either attached to a drill or as a hand brush. Another method is to soak the pliers in a mild acid solution. A mixture of vinegar essence and water, or dissolved citric acid, can dissolve rust overnight. Bear in mind that the acid can also attack sound metal. Afterwards, neutralise the pliers thoroughly with a soda solution and water, then dry and oil them immediately.
Important note
Always wear safety goggles and gloves when working with rust removers, acids or power tools. Rust particles and chemical splashes can cause serious injuries.
Using power tools on heavily rusted pliers
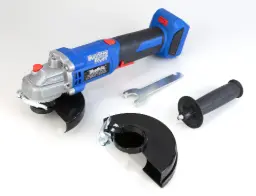
For old, heavily rusted heirlooms or flea-market finds, using power tools can make sense. An angle grinder such as the 18 V angle grinder BL 125 mm, fitted with a cup wheel or flap disc, removes heavy rust quickly and efficiently. Work carefully and use light pressure to avoid removing too much material. This method is ideal for completely restoring a tool.
Check and maintain the mechanism: joint and teeth
A clean, rust-free pair of pliers is good, but fully functional pliers are even better. The mechanism deserves special attention.
The joint: the key to smooth operation
The joint is the heart of water pump pliers. It should move easily without having excessive play. After cleaning and oiling, the pliers should open and close smoothly. If they stick, work in more oil and move the joint repeatedly through its entire adjustment range. Remove all old, gummy grease.
The gripping teeth: sharp and clean for a secure hold
The teeth provide the necessary grip. Check that they are clean and free of metal filings or other dirt. A small wire brush helps with cleaning. The teeth are hardened and should not be sharpened, as this would destroy the hardened layer. If the teeth are badly worn and rounded, the pliers will lose their grip and should be replaced.
Additional tip
The rubberised handles of your pliers also benefit from care. Clean them with a damp cloth and mild soap. Avoid aggressive solvents, as they can damage the material and make it brittle.
Proper storage: protection from the elements
The best maintenance is pointless if the tool is then stored incorrectly. Moisture and mechanical damage are the main hazards.
Store your pliers in a dry place. A damp corner of a basement or a box in a garden shed are unsuitable. Ideally, keep them on a tool wall or in a closed socket set and toolbox in a garage or workshop with low humidity.
Avoid throwing tools loose on top of one another in a box. The pliers can knock against each other, causing dents and scratches that create points where rust can take hold. A tool board with holders or a drawer with suitable inserts keeps everything organised and protected.
Bringing an old tool back to life is more than just a repair. It is a sign of respect for craftsmanship and a commitment to sustainability.
By giving your water pump pliers this regular attention, you can ensure that they remain a powerful and reliable partner for many years. A well-maintained tool is not only a pleasure to use, but also a lasting appreciation of quality and craftsmanship.
Frequently Asked Questions
- What is the best oil for water pump pliers?
- For the joint, use penetrating oil such as WD-40, as it displaces moisture and cleans at the same time. For long-term protection against surface rust, a resin-free and acid-free oil, such as Ballistol or a light machine oil, is the better choice because it does not evaporate as quickly.
- How often should I oil my water pump pliers?
- Oil your pliers after every use in a damp environment or after thorough cleaning. If you use them infrequently in dry rooms, treating them every few months is enough to protect the metal from surface rust and keep the joint moving smoothly.
- Can I completely remove rust from my pliers?
- Yes, rust can be removed in most cases. Light surface rust disappears with steel wool and oil. For heavy rust, wire brushes, chemical rust removers or power tools can help. However, small pits in the metal, known as pitting, may remain.
- What should I do if the joint of the pliers is sticking?
- A sticking joint is usually caused by rust or old oil that has become gummy. Soak the joint generously with penetrating oil and leave it to work. Then open and close the pliers repeatedly to loosen the blockage. Afterwards, clean the joint and apply fresh oil.
- Is it worth restoring an old, rusty pair of water pump pliers?
- Absolutely. High-quality old pliers are often made from very good steel. Restoration is not only sustainable, but also rewarding. With a little work, you can turn a rusty heirloom into a fully functional and reliable tool again.
You may also be interested in
- How to use water pump pliers correctly: a DIY guide
- Garden tool maintenance: how to make your tools last longer
- Buying a water pump pliers set? Your guide to Cr-V pliers
- Chainsaw bar maintenance: tips for a long service life
- Cleaning and maintaining the VP1 attachment pump: how to ensure a long service life
- Maintain hardware like a professional: stop rust and squeaking