
In brief: Calculate the amount of interior plaster by determining the wall area in square metres and multiplying it by the recommended coat thickness. For standard base coats, allow 10-15 kg/m² per cm of coat thickness. The substrate and plaster type are key: gypsum plaster has a different coverage rate from clay or lime plaster. Always allow 5-10% for waste and buy plaster from one batch to avoid colour differences.
Calculate Interior Plaster Needed: The Key to a Renovation That Stays on Budget
You are planning to plaster your walls. The first thought is often the cost. Accurately calculating interior plaster consumption is the basis for a realistic budget and a smooth workflow. Too little material means work comes to a halt and colour variations may occur. Too much means wasted money.
We show you the exact method used by professionals. You will learn how to determine your wall area correctly, choose the right coat thickness and calculate the material needed for your specific type of plaster. By the end, you will have a shopping list that fits your project.
The formula is simple: Area (m²) x coat thickness (cm) x specific consumption (kg/m²/cm) = total requirement (kg). The challenge lies in the details.
The basics: What determines your plaster consumption?
Before you use the formula, clarify the factors that affect the result. Not every wall is the same. The old plaster, the building fabric and your project all influence the quantity.
The substrate is the most important factor. A smooth plasterboard wall needs less material than a rough, porous brick wall. Highly absorbent substrates such as old masonry increase consumption because the fresh plaster loses water. You must pre-wet them or treat them with a bonding primer.
The type of plaster itself has the greatest impact. Lightweight clay plaster has a different density from mineral lime-cement plaster. Whether the product is dry or fresh is crucial. Dry mixes weigh less than ready-mixed wet plaster. Always consult the manufacturer's information on the packaging.
The biggest source of error when calculating consumption is underestimating uneven walls. Old masonry that appears straight can have local variations of more than two centimetres. This multiplies the material needed in those areas.
Step 1: Determine the wall area precisely
Calculating areas sounds like school mathematics. On building projects, however, it is often done rather carelessly. Follow this system to plan your requirements to the square metre.
Measure one room at a time. Record the length and height of each wall. Multiply the two measurements to get the gross area. Add the gross areas of all the room's walls together. This is your starting figure.
Now subtract all openings. For a standard interior door, allow for 2 square metres. A window covers 1 to 4 square metres, depending on its size. Measure it precisely: window width x window height. Do not forget to add any recesses, chimney breast projections or similar features.
Pro tip
Use a laser distance meter. It measures faster and more accurately than a tape measure, especially in tall rooms. Modern devices even calculate areas and volumes automatically. The investment pays off even for a medium-sized renovation project.
Example: A room is 5 m long, 4 m wide and 2,5 m high. It has one door (2 m²) and one window (1,5 m²). The gross wall area is: (5m+4m+5m+4m) * 2,5m = 45 m². After subtracting the door and window (3,5 m²), the net area to be plastered is 41,5 m².
The overlooked areas: reveals and corners
Window and door reveals, meaning the interior side surfaces of the openings, are often overlooked. They also need to be plastered or at least given a slurry coat.
Calculate the reveal area as follows: measure the reveal depth and the perimeter of the window or door. Multiply the two measurements. With a reveal depth of 15 cm (0,15 m) and a window perimeter of 6 m, this gives an additional 0,9 m². This quickly adds up across several windows.
Corners and edges often need slightly more material because they are worked with a screed board. This is included in the waste allowance that you add later.
Step 2: Determine the right coat thickness
The thickness of the plaster coat is the variable factor in your calculation. It depends not on personal preference, but on the condition of the substrate and the function of the plaster.
A base coat levels out imperfections. If the wall is wavy or very uneven, you must use the deepest depression as the minimum coat thickness. Find the highest point of the wall with a long spirit level or straightedge. Then measure the deepest point. The difference plus a minimum application thickness of 5-10 mm gives you the required coat thickness.
For relatively flat walls, 10-15 mm of base coat is usual. Rough old masonry may require 20-30 mm. A finish coat or renovation plaster is often applied at just 2-5 mm.
Important note
Observe maximum coat thicknesses! Every type of plaster has a manufacturer-defined maximum thickness per application, often 20 mm for gypsum base coat. If you need more, you must plaster in two passes, allowing the first coat to set completely. If you exceed the thickness, you risk flaking and cracks.
Record the estimated average coat thickness for each wall or room. If the walls vary considerably, it is better to divide them into separate areas.
Preparing the substrate: the trick to using less plaster
Good preparation saves material. Remove loose old plaster thoroughly. Prime highly absorbent substrates with a deep-penetrating primer. This reduces absorbency and prevents the fresh plaster from losing water too quickly.
For very uneven walls, it is worth fitting plaster screed rails or applying a spatterdash coat as a bonding bridge. This creates a flat reference surface and helps distribute the material evenly. You can find information on tarps and covering materials in our Tarps + Netting category.
Many DIYers shy away from using plaster screed rails or straightedges. Yet they are the most effective tools for achieving an even coat thickness. They prevent local thick spots that drive up material consumption and lead to uneven drying times.
Step 3: Find out your plaster’s coverage rate
This is where it gets specific. Every bag of dry plaster includes coverage information. It typically reads: “approx. 10 kg/m² at a layer thickness of 10 mm”. This figure is your key value.
Keep in mind: This information applies to dry plaster mortar. Gypsum plasters have a coverage rate of around 9-11 kg/m² per cm. Lime plasters require 10-13 kg/m² per cm. Clay plasters can require up to 14-16 kg/m² per cm because they have a lower bulk density.
Ready-mixed plaster in tubs (wet mixes) is specified in liters per square meter. Here, you need to know the product’s specific weight or calculate directly using the recommended application rate in l/m².
Additional advice
Always buy plaster from a single batch. Color and texture differences between production batches are possible, even with white base coats. Note the batch number on the bags. A sturdy three-sided platform cart can be very helpful for transporting the heavy bags.
The calculation: From theory to shopping list
Now put everything together. Let’s assume your net wall area is 41,5 m². The average layer thickness for the base coat should be 15 mm (1,5 cm). You are using a gypsum base coat with a coverage rate of 10 kg/m²/cm.
Calculation: 41,5 m² x 1,5 cm x 10 kg/m²/cm = 622,5 kg of dry mortar.
Now add an allowance for waste. For an experienced DIYer, 5% is realistic; for uneven walls or first attempts, allow 10%. With a 10% allowance: 622,5 kg x 1,10 = 684,75 kg.
Plaster is sold in 25 or 30 kg bags. You therefore need: 684,75 kg / 25 kg/bag = 27,39 bags. Rounded up, that is 28 bags of 25 kg each.
Calculate the subsequent top coat (fine filler) separately: the same area of 41,5 m², a layer thickness of 2 mm (0,2 cm), and coverage of, for example, 0,7 kg/m²/mm (a typical value for fine plaster). Calculation: 41,5 m² x 0,2 cm x 0,7 kg/m²/mm = 5,81 kg. With waste (10%): ~6,4 kg. That corresponds to a small bag.
Step 4: From quantity to cost
With the number of bags in hand, calculate the material costs. Research the price per bag for your chosen plaster. Remember the accessories: primer, plastering tubs, a sturdy mixing drill, a smoothing trowel and a float.
The biggest cost trap is not the plaster itself, but the consequences of an incorrect calculation. Having to make an additional purchase because you run out of material costs time and travel expenses. A second batch may look different. Plaster bought in excess loses quality over the course of several months and becomes unusable if exposed to moisture.
For protecting furniture and floors during the work, garden fleece or special protective sheets are ideal. They are highly absorbent and protect against splashes.
Practical checklist before buying
- Area: Net wall area in m², including reveals?
- Layer thickness: Realistic thickness based on measuring the substrate?
- Plaster type: Manufacturer’s coverage rate (kg/m²/cm) noted?
- Waste: 5-10% allowance added?
- Bag size: Rounded up to a whole number of bags?
- Batch: Is it possible to buy everything from a single batch?
- Transport: Do you have the capacity to transport several hundred kilograms? A heavy-duty three-sided cart can help here.
Special cases: Old walls and drywall
Not every substrate is standard new-construction masonry. Old, uneven walls and drywall require their own approach.
With timber-framed buildings or very uneven stone walls, the layer thickness can vary considerably from one area to another. Here, it is best to calculate using the maximum required thickness and a higher waste allowance of 15-20%. Alternatively, use plastering rails as guides and fill between them.
Drywall made from plasterboard often does not require a traditional base coat. Jointing the board seams and filling the screw heads with filler is usually sufficient. Consumption is minimal (a few kg per room). For a completely smooth surface, a thin top coat (2-3 mm) can be applied.
For decorating after plastering, you can find inspiration and materials in our wall design category.
Product recommendation: The right equipment for a clean job
A clean worksite is an efficient worksite. Dust and splashes get in the way of your work. The
, an electronic UV insect trap, keeps flies and other insects away from the fresh plaster surface while it dries. This prevents insects from becoming embedded in the dried surface.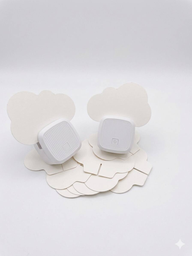
Sturdy containers are needed for safely mixing and storing water and plaster. Support and transport systems such as our various distributors and wall brackets can be used as makeshift supports for worktops.
Conclusion: Planning beats guesswork
Calculating the amount of interior plaster you need accurately is not rocket science; it is a systematic process. Measure carefully, assess the substrate realistically and follow the manufacturer’s specifications. This method helps you avoid the typical pitfalls: running out of material, batch-related problems and spiraling costs.
The time invested in planning pays off several times over during the work. You can work calmly because you have enough material. You save money because you do not have to buy twice or throw anything away. And you achieve a professional result that will last for years.
Do not start your next plastering project with the trowel, but with the tape measure and calculator. Your wallet and your nerves will thank you.
Frequently asked questions
- How much plaster do I need per square meter of wall?
- The exact amount depends on the type of plaster and the thickness of the layer. For a 1 cm layer of gypsum base coat plaster, you need around 10-12 kg/m². Clay plaster can use 11-14 kg/m² at the same thickness. Lime plaster falls somewhere in between. Always follow the manufacturer's instructions on the bag. Uneven surfaces can significantly increase the amount you need.
- How do I measure a wall to calculate how much plaster I need?
- Measure the length and height of each wall separately, then multiply them to calculate the area in m². Subtract the areas of doors (approx. 2 m²) and windows (approx. 1-3 m² each). Measure window and door reveals separately, as these also need plastering. Add up all the individual areas. A laser distance measurer can significantly improve accuracy.
- Why should I allow for waste when buying plaster?
- Waste can result from uneven surfaces, overlaps at corners, material falling off during mixing and application, and corrections. Allowing an additional 5-10% is realistic. If you calculate too closely, you risk running out of material and creating color differences when using a second batch. Excess plaster can often be returned within a specified period.
- Can I mix leftover gypsum plaster with lime plaster?
- No. Different types of plaster, such as gypsum, lime, and cement, should never be mixed. They set through different chemical processes and won't form a stable, crack-free layer. For a uniform surface, always use a complete system from the same manufacturer. Never cover plaster that hasn't fully set with another type of plaster.
- How does coverage differ between base coat and finish coat plaster?
- Base coat plaster is applied in a considerably thicker layer (often 1-2 cm) to level uneven surfaces. Its coverage is therefore the main cost factor. Finish coat or fine plaster forms only a thin, smoothing layer of a few millimeters. It requires less material (often 1.5-3 kg/m²), but is crucial for the final appearance. Plan for both separately.
You might also be interested in
- How to plaster walls: a step-by-step guide for DIYers
- Wallpaper or plaster: how to finish your interior walls
- Shell construction costs: how to estimate the cost of your dream home
- Mixing concrete: how to calculate the right amount of cement
- Interior wall insulation: insulate properly and lower heating costs
- How to apply and paint mineral plaster: a step-by-step guide