
In brief: For a deck, first calculate the required decking area, then the substructure, edge clearances, fixings and ten to fifteen per cent waste. Divide the area by the coverage width of one board, including the gap, check standard lengths and plan the substructure with suitable support points and sufficient ventilation.
For a deck, first calculate the required decking area, then the substructure, edge clearances, fixings and ten to fifteen per cent waste. Divide the area by the coverage width of one board, including the gap, check standard lengths and plan the substructure with suitable support points and sufficient ventilation.
When laying decking boards, planning determines the cost, appearance and durability. An order that is calculated too tightly can lead to colour variations and delivery delays. Too much material ties up money and leaves unnecessary offcuts.
The material requirements include more than the visible decking area. You need a suitable substructure, supports, fixings, spacers, tools and a reserve for cutting and sorting.
How do you determine the required number of decking boards?
Start with a roughly scaled plan. Measure the length and width at several points, as house walls, walls and existing surfaces are not always exactly parallel. Record projections, steps, posts, drains and recesses separately.
Determine the area and laying direction
Multiply the length and width of each rectangular section. For a deck measuring 4,80 metres long and 3,60 metres wide, this gives 17,28 square metres. Divide L-shaped areas into two or more rectangles and add the results together.
The laying direction affects waste. Lay the boards in the direction that best matches the available lengths. A drawing showing the board rows will reveal early where butt joints, edge pieces and cut-outs will occur.
Use the coverage width instead of the nominal width
For calculating the number of boards, use the coverage width. This consists of the visible board width and the planned gap. A board with a visible width of 145 millimetres and a gap of 6 millimetres covers 151 millimetres for calculation purposes.
In the example, divide the deck width of 4,80 metres by 0,151 metres. The result is around 31,8 rows, so plan for 32 rows. With a row length of 3,60 metres, you initially need 115,2 linear metres of decking boards.
Add at least ten per cent to the basic quantity as a reserve. This gives around 126,7 linear metres. With 3,60-metre boards, round up to 36 boards and also check whether the selected length can actually be used without impermissible butt joints.
- Base area: length multiplied by width of each section
- Number of rows: deck width divided by coverage width
- Linear metres: number of rows multiplied by row length
- Order quantity: linear metres plus ten to fifteen per cent reserve
Pro tip
Draw the board rows into the plan before placing your order. Mark every butt joint and cut-out. This will show whether a standard length is suitable, whether you need a double joist at a board joint and how many short offcuts can actually be used.
Which board dimensions affect material requirements?
The width, thickness and length of the boards determine not only the quantity but also the structure. Check the manufacturer's technical specifications before sizing the substructure. Narrow boards create more rows, while wide boards reduce the number of rows but may show larger gaps and greater dimensional changes.
Plan the gap width correctly
The gap allows rainwater to drain away and the surface to dry again after exposure to moisture. Use the gap width specified in the installation instructions. For an accurate calculation, add this width to each board instead of calculating only with the visible timber width.
The gap should appear as even as possible across the surface. Spacers help with alignment, but they do not replace checks with a tape measure and straightedge. At house walls and fixed structures, you also need the edge clearance specified by the manufacturer.
Standard lengths and butt joints
On short decks, you can use one continuous board for each row. On larger surfaces, several boards are joined end to end. Stagger the butt joints and avoid a regular step pattern that visually divides the surface.
Each board joint needs suitable support. This often means using two parallel joists with a small gap between them. The board ends must not rest on a single narrow support unless the system specifies another solution.
Plan edge and finishing boards separately. A surrounding frame can improve the appearance, but it increases the need for cuts and fixings. For a step or a visible fascia, you will also need material for the cladding.
“For timber decks, drainage, ventilation and a load-bearing substructure must be planned together. Persistent moisture in the decking and joists shortens their service life.”
How do you calculate the substructure?
The substructure supports the decking and distributes the load across the ground. Calculate it based on the planned centre-to-centre spacing of the joists. The key factors are board thickness, timber species, profile, use and the system specifications.
Joists and centre-to-centre spacing
Divide the deck width by the permitted centre-to-centre spacing and round up. Add at least one additional joist for the edge. For a width of 4,80 metres and a maximum centre-to-centre spacing of 45 centimetres, you need at least twelve parallel joists if the edge position is suitably constructed.
With a row length of 3,60 metres, twelve joists initially amount to 43,2 linear metres. Add edge joists, double joists for butt joints and additional cross members at stairs, cut-outs or posts. Depending on the layout, add another ten to twenty per cent for these.
The simple calculation is not sufficient for a larger or raised deck. In that case, check the load-bearing capacity, load transfer and fixing of the substructure. A freestanding structure may require structural planning.
Supports, ground and fall
The ground must be level, stable and permanently drained. On natural ground, remove the topsoil and create a suitable base of compacted material. On slabs or concrete, check that water can drain away and that waterlogging cannot occur beneath the deck.
Plan supports at regular intervals along every joist. The exact spacing depends on the system, cross-section and load. Use adjustable feet, concrete slabs or suitable support pads only in accordance with the relevant installation instructions.
A slight fall away from the building supports water drainage. However, the structure must not tilt or exceed the connection height at the house. Check height points with a long straightedge or a levelling device.
Important note
Do not place decking boards or substructure timber directly on soil or permanently standing water. Separate the timber from the ground, keep drainage paths clear and allow sufficient air to circulate between the decking and the ground. For raised decks, also check railings, steps and the entire load transfer.
What fixings and tools do you need?
The fixings depend on the decking board profile and the material used for the substructure. Visible screws, hidden clips and side-fixing systems have different requirements. Buy fixings as a matching system and do not mix random clips with an incompatible profile.
Calculating screws or clips
For visible screw fixing, allow for two fixings per decking board support. In the example, 32 rows of decking boards, twelve joists and two screws per intersection initially give 768 screws. With a ten per cent reserve, you need around 845 screws, rounded up to standard pack sizes.
Choose corrosion-resistant decking screws in the correct length. As a rough guide, the screw should penetrate the substructure to a depth of at least around two and a half times the board thickness, unless the manufacturer's instructions specify otherwise. Pre-drill at the edges and board ends to prevent the wood from splitting.
For clips, calculate the required quantity based on the planned fixing points. Start and end clips, spacers and spare parts should be included in the same order. Hidden-fixing profiles often require a special tool or a suitable bit.
Tools and site organisation
For laying decking, you need a tape measure, pencil, straightedge, spirit level, string line, saw, drill, suitable bit, spacers and personal protective equipment. A mitre saw speeds up repeated cuts. A circular saw with a guide helps with long, straight cuts.
For pre-drilling and neat screw fixing, a suitable should be included in your tool planning. Keep screws, clips and spacers within easy reach. A workshop trolley and material stand keeps tools and accessories organised during installation.

Additional advice
Only place as many decking boards on the substructure each working day as you can properly align and fix. Store cut pieces separately from full-length boards and mark the visible side. This helps prevent mix-ups, unnecessary trips and damaged edges.
How can you reduce waste when laying decking?
Waste is created at edges, corners, steps, posts and butt joints. For a rectangular area with a straight layout, a ten per cent reserve is often sufficient. For diagonal layouts, numerous cut-outs or varying board lengths, it is better to allow fifteen per cent or more.
Create a laying plan before cutting
First mark the visible finishing edges on the plan. Then decide where full-length boards will start and end. Short offcuts should not be used in prominent edge areas if they compromise the appearance or stability.
Avoid narrow edge strips. If an area ends with an almost full board, divide the difference between both sides. This makes the edge boards look balanced and reduces problematic narrow cuts.
With a diagonal layout, consumption increases significantly because many triangular offcuts are created along both edges. Only buy longer boards if they can be installed without additional butt joints. Also check that the board length is suitable for transport and storage space.
Store materials and protect them from the weather
Store decking boards and the substructure on level supports, in a dry, well-ventilated place and clear of the ground. Stack the timber straight so that it does not warp unnecessarily before installation. Completely airtight packaging can trap moisture.
For temporary cover, suitable decking tarpaulins or products from the tarpaulins and nets range are suitable. Secure a cover so that the wind cannot rub it against the board edges. or can be used as fixing aids when storing materials.
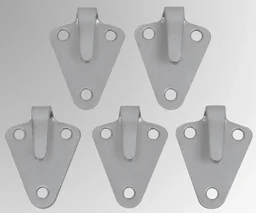
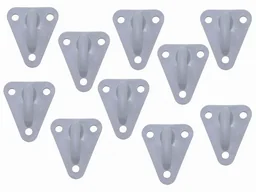
For organised temporary storage, material stands are useful. Do not mix material batches. Boards from different batches may vary in colour, moisture content and grading.
“When planning timber decking, joints, ventilation and structural timber protection must be considered together. The decking must not retain water permanently.”
What materials do you need for your decking?
Only create your shopping list once the laying direction, board dimensions and subframe have been finalised. Separate the basic requirements, spare materials and optional equipment. This gives you an immediate overview of which items are essential for the area.
The six-item shopping list
- Decking boards: Calculate the number of rows, linear metres and spare materials based on the coverage width, including the gap. Add edge, finishing and step boards.
- Subframe: Calculate the joists based on the spacing, row length and layout. Add perimeter joists, double joists at board joints and crosspieces around cut-outs.
- Supports and separation: Plan concrete slabs, adjustable pedestals or suitable pads according to the substrate and system specifications. Wood must not stand in water permanently.
- Fixings: Count screws or clips for each board support and add ten percent spare. Buy starter and end fixings that match the system.
- Tools and consumables: Have drill bits, screwdriver bits, saw blades, spacers, marking pens and protective clothing ready. Check their condition before making the first cut.
- Protection and storage: Have supports, covers and secure fastenings ready for temporary storage. Protect the materials from ground moisture, dirt and strong winds.
Calculate the materials and check your order
- Measure the finished outside edge of the decking and divide the layout into sections.
- Determine the direction of the decking and mark board joints, edge areas and cut-outs.
- Calculate the coverage width from the board width and planned gap.
- Calculate the number of rows, linear metres and standard lengths required.
- Plan the subframe, supports and double joists separately.
- Count the fixings for each support point and add the spare materials.
- Check the batch, supplied lengths, storage space and transport before placing your order.
Compare the calculated quantity with the retailer's pack size. Round up boards, timber, screws and clips to the next full unit in each case. Before installation, check the gap size, edge clearances, fall and position of all supports once again.
Careful planning makes your material requirements easy to understand. You order the right quantity, avoid unnecessary offcuts and create the conditions for an even, well-ventilated deck.
Frequently asked questions
- How much waste should I allow for decking boards?
- Allow for at least ten percent waste on straight, rectangular areas. For diagonal installation, numerous cut-outs or different board lengths, allow for fifteen percent. If possible, buy the materials from the same batch and check before ordering whether individual boards have visible grading or length variations.
- How do I calculate the number of decking boards I need?
- Multiply the length and width of the deck and divide the area by the coverage width of one board, including the gap. Add ten to fifteen percent for waste and round up to full boards. For steps, cut-outs or several laying directions, calculate each section separately.
- What spacing does the subframe need?
- The spacing depends on the board thickness, type of wood and the manufacturer's specifications. For many decking boards, the spacing between joist centres is approximately 40 to 50 centimetres. Thinner profiles often need closer supports. Follow the installation instructions, add extra supports at board joints and avoid leaving board ends unsupported.
- How much subframe timber do I need?
- Add up the lengths of all parallel joists and include perimeter joists, double joists at board joints and additional crosspieces around cut-outs. Divide the deck width by the planned spacing between joist centres, round up and multiply by the deck length. This gives you the basic requirement before you buy spare materials.
- Which screws do I need for decking boards?
- Use corrosion-resistant decking screws of the correct length, at least approximately two and a half times the board thickness unless the manufacturer specifies otherwise. For visible fixings, choose a suitable screw head and pre-drill the edge areas. Clips only work with the intended board profile and compatible subframe.
You may also be interested in
- Installing decking boards: 7 common mistakes and how to avoid them
- Building a deck made easy: planning, materials and instructions
- Decking materials: wood, WPC and stone compared
- Building and maintaining a wooden deck: the ultimate guide
- Laying patio slabs: step by step to a durable surface
- WPC decking boards: benefits and care for your deck