
In brief: You can successfully plaster over bathroom tiles to create a rustic textured-plaster finish. The tiles must be thoroughly degreased, roughened and treated with a bonding primer. You then apply a special moisture-resistant textured plaster. The result is a modern, individual wall design without the laborious removal of the old tiles.
Why plaster over tiles instead of replacing them?
Replacing all the bathroom tiles is noisy, dusty and expensive. Plastering over them with textured plaster offers a clever alternative. You can transform a smooth, often cold-looking surface into a warm, textured wall.
This method saves time and resources. You do not need to buy new tiles or dispose of waste, and the building fabric remains largely untouched. The result is more individual than any pre-fabricated tile.
The rustic look of textured plaster is a perfect match for modern and country-style interiors. This creates a unique character in the bathroom.
How do I prepare the tiles correctly?
Preparation is the crucial step for ensuring the plaster stays firmly in place. Smooth, glazed surfaces do not provide sufficient adhesion on their own.
Start with a thorough clean. Remove all soap residue, limescale and grease. A degreasing cleaner is essential here.
Important note
Do not skip roughening the tiles. Bonding primer cannot form a mechanical bond on a smooth surface. The result would be flaking after a short time.
After cleaning, roughen the entire surface thoroughly. An orbital sander with a diamond sanding disc will do this reliably. The aim is an evenly matt, slightly scratched surface.
Vacuum up the resulting fine dust thoroughly. A powerful wet/dry vacuum such as the
is ideal for this job. It prevents dust from settling on the freshly roughened surface and reducing adhesion.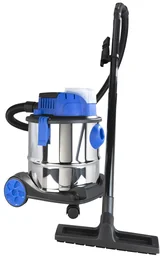
Adhesion is 70 percent preparation. A perfectly roughened, dust-free and primed surface is half the battle for a result that lasts a lifetime.
Choosing the right primer
Apply a bonding primer to the prepared surface. These special dispersion primers contain quartz sand and further increase the surface roughness.
Apply the primer evenly and without gaps using a roller. Work systematically from one corner to the other. Observe the manufacturer's recommended contact time.
Only start applying the plaster once the primer is completely dry. This step seals any remaining pores and creates the ideal base.
Which textured plaster should I use in the bathroom?
Not every plaster is suitable for damp rooms. Bathrooms have a particular climate with changing humidity and direct exposure to water.
Choose a plaster that is expressly approved for damp rooms or interiors. These products inhibit mould growth and allow water vapour to diffuse. Acrylic or synthetic-resin plasters are often the best choice here.
Pro tip
Test your chosen plaster and the desired texture beforehand on a test area or a piece of plasterboard. This helps you get a feel for the working time and the final appearance in your lighting conditions.
The consistency must suit the application method you want to use. For an even, thinner coat, choose a more spreadable plaster. For deep, handcrafted textures, you need a thicker paste.
Also consider the colour. You can paint textured plaster once it has dried. Alternatively, choose a through-coloured plaster, where small areas of wear will be less noticeable later.
How do I apply the plaster correctly?
Application determines the appearance and durability. Work in manageable areas of about one square metre.
Use a finishing trowel to pick up a portion of plaster and press it firmly onto the wall. Then spread the material evenly using moderate pressure. The coat should be as thick as the largest grain in the plaster.
Use a wet stainless-steel trowel to create smooth transitions between working areas. This prevents visible joins. Work quickly, but do not rush.
The rhythm of smoothing makes all the difference. An even, flowing movement from the shoulder gives the plaster its uniformity. Too much reworking with the trowel destroys the natural texture.
Creating textures
The rustic look comes from the texture. You can create it directly with the smoothing trowel or rework it with specialist tools.
For an evenly grained surface, simply leave the plaster as the trowel has smoothed it. For special effects, use texture rollers, sponges or even brushes.
Create a coarse wall design with an irregular circular motion using a coarse plaster sponge. Experiment on your test area.
Additional advice
Allow several uninterrupted days for plastering over tiles. The drying times between the individual steps are essential. Rushing leads to cracks and poor adhesion.
Which tools are essential?
Good tools make the job easier and improve the result. The basics are a sander, vacuum cleaner, primer roller, trowels and putty knives.
A powerful vacuum cleaner is doubly important: for preparation and keeping things clean while you work. The 3-in-1 stainless steel wet/dry vacuum cleaner and blower
is a robust all-rounder for Garden + Outdoor and the home.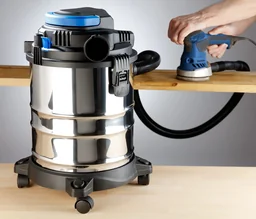
For the final cleaning of tools and any touch-ups around the joints, a practical 2-in-1 joint and tile brush
is ideal. It effectively removes dried plaster residue from trowels and corners.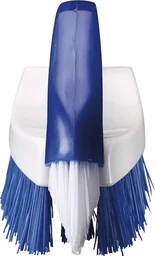
Don't forget your personal protective equipment. A dust mask when sanding, gloves when applying primer and safety glasses are essential.
How do I care for the new textured plaster finish?
A plastered bathroom surface needs proper care. It is durable, but not as scratch-resistant as glazed tile.
Clean the surface only with a soft cloth and mild, acid-free cleaners. Harsh abrasive cleaners can damage the texture and dull the plaster.
Once the surface has fully cured, you can seal it with a special plaster sealant in the shower or above the sink. This makes it easier to maintain.
Check the joints regularly where the surface meets other materials, such as the bathtub or windowsill. Silicone sealant is still the flexible, waterproof solution of choice for these areas.
With the right preparation, suitable materials, and a little DIY skill, you can transform your old bathroom into a unique, welcoming space. Applying rustic textured plaster over old tiles is more than a renovation—it’s a reinvention.
Frequently Asked Questions
- Will textured plaster stay on old tiles permanently?
- Yes, as long as you prepare the surface properly. Adhesion depends on thorough cleaning, roughening the smooth surface, and applying a high-quality bonding primer. You should also use plaster suitable for damp areas. This helps the plaster stay firmly attached and withstand typical bathroom humidity.
- What tools do I need to plaster over tiles?
- You’ll need a sturdy random orbital sander with a diamond sanding disc to roughen the surface, a vacuum cleaner for thorough cleaning (such as PRODUCT_73106), a roller for the primer, a finishing trowel and a stainless steel putty knife to apply the plaster, plus a texture roller for special finishes if needed. Protective gear is essential.
- Can I plaster over any type of bathroom tile?
- Generally, yes, but heavily textured or flaking tiles aren’t suitable. Smooth, glazed tiles are ideal, but you must roughen them first. Check that the substrate is stable. In showers exposed to direct water spray, use waterproof systems and grout.
- How long does textured plaster need to dry before it gets wet?
- Drying time varies depending on the product and the thickness of the layer. Wait at least 24-48 hours before using the bathroom again. Full curing can take several weeks. Ventilate the room regularly during this time to remove moisture, and keep the surface from getting wet.
- Can I remove textured plaster later without leaving any residue?
- No. Plastering over tiles is a permanent solution. Removing the plaster later would destroy the tiles underneath. Choose this option only if you’re happy with the rustic look long term or want to avoid installing a completely new substrate.
You may also be interested in
- Plastering over old tiles: a guide to smooth walls
- DIY kitchen backsplash: create a trendy concrete look
- Tiling over tiles: a clever renovation solution
- Wall effects: create a modern stone look for your walls
- How to plaster walls: a step-by-step guide for DIYers
- How to apply filler: techniques for perfect walls